 Reading Time: 3 minutes
Currently i am working on the new official software solution for the FabScan 3D Scanner. But FabScan PI will be more than only a software solution. With FabScan PI, as the name suggests, you are able to run your FabScan with a Raspberry PI2.
Here are some pictures and videos of the new alpha version. If you are an owner of the „old“ FabScan CUBE setup don’t worry, FabScan PI will be fully downward compatible. But i suggest to use a Raspberry PI2.
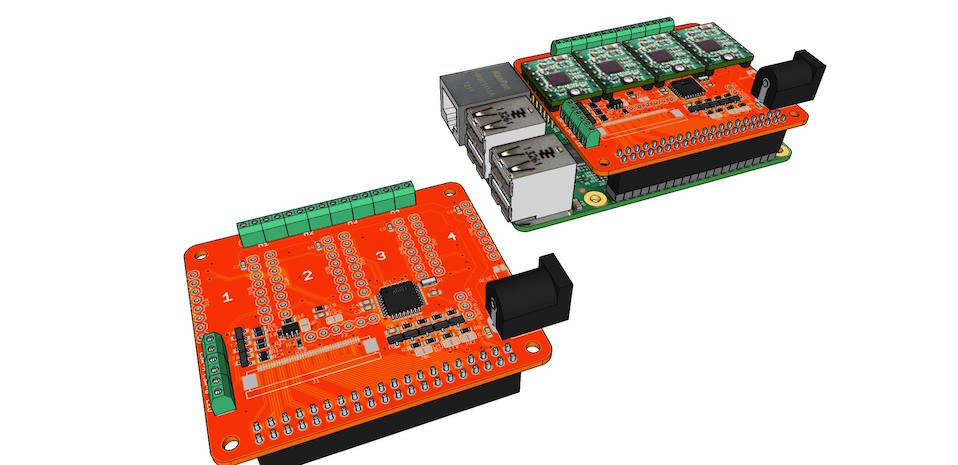
Hardware
FabScan PI2 uses a Raspberry PI2 with the PI camera module as base system. Additionally a 12 LED ring is added make environment lighting control easier. With this combination the scan results can be drastically increased. There will be a Raspberry PI FabScan HAT available at Watterott electronics soon.
Software
The new software consists of two parts. The backend and the fronted. The backend does all the magic 3D scanning stuff. While the fronted is used to visualize all the crated data. The backend is written in python an can be easily modified. The fronted is written in Javascript and uses HTML 5 technologies like WebGL and WebSockets.
The backend provides two API’s. One WebSocket API for all ‚realtime‘ data events like new points for point clouds and the basic controls. The second API is a REST interface to the backend and it should be used for all big data things, like loading, downloading, uploading etc. files.
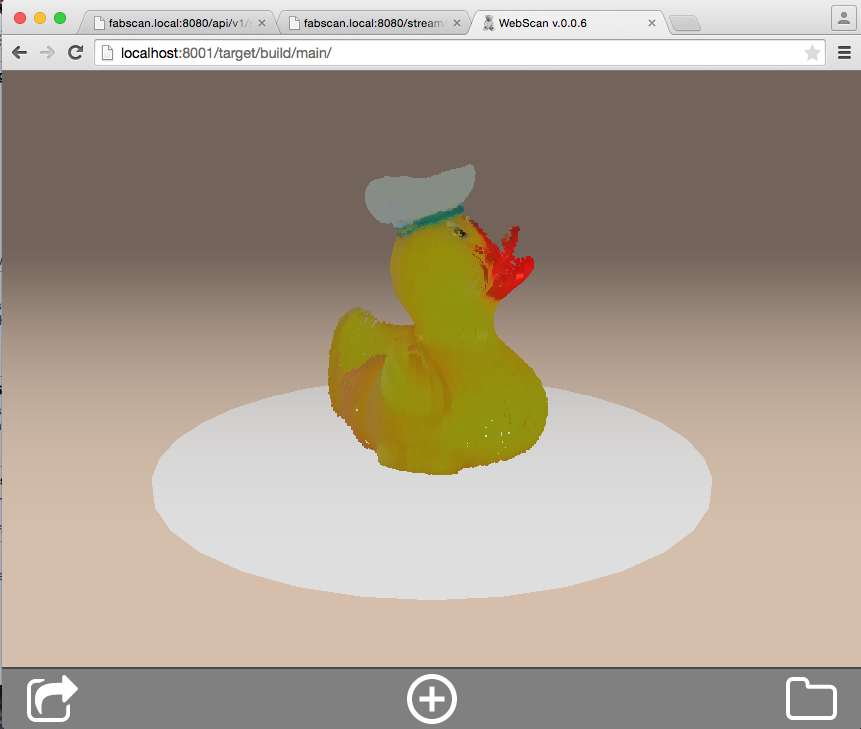
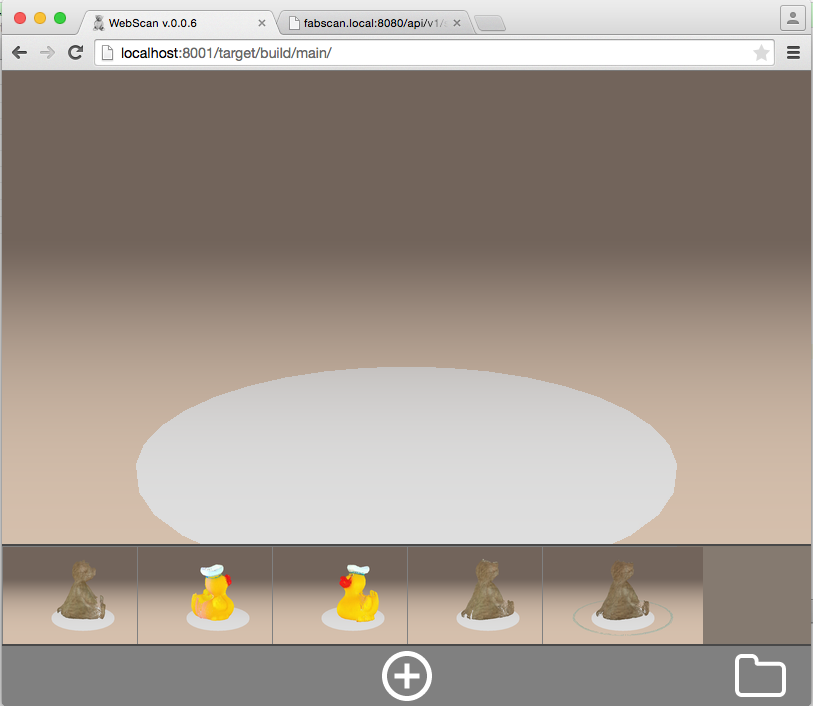
Main Window
This is the point where you will start from. You can add a new scan, load old scans or share loaded and new scans.
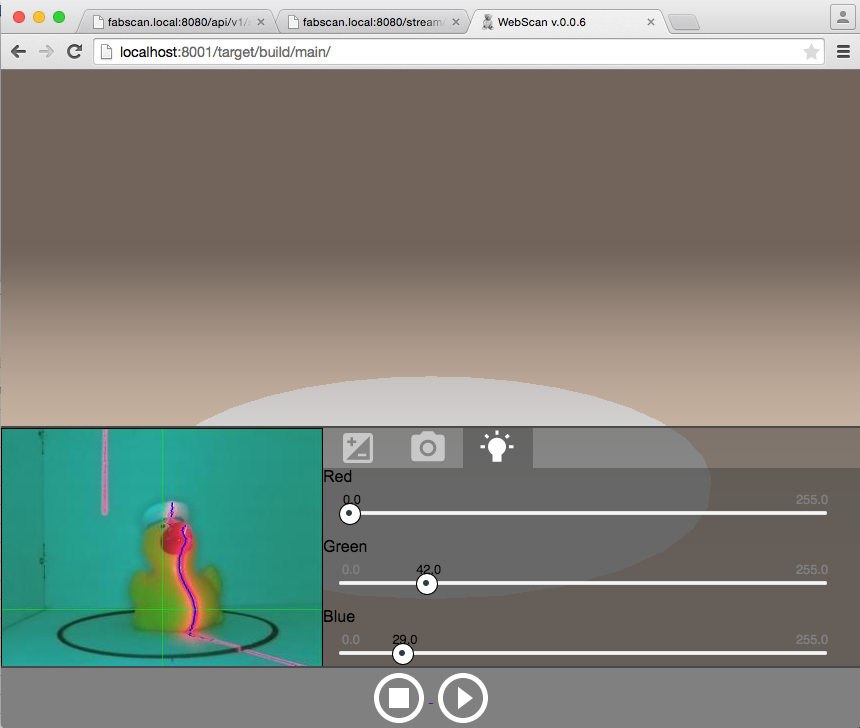
Settings Dialog
The settings dialog shows up before each scan. Here you can change settings like threshold value, camera brightness and contrast and much more. On the left side of this dialog you can see a realtime laser detection video stream. This stream helps you to find the best settings for the object which you want to scan.
Loading Dialog
With the loading dialog you are able to load your previous scans.
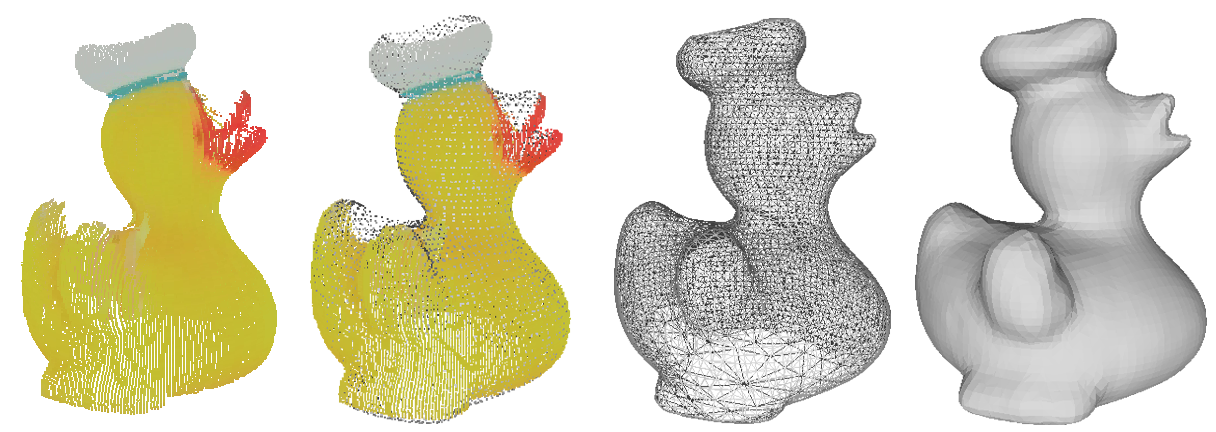
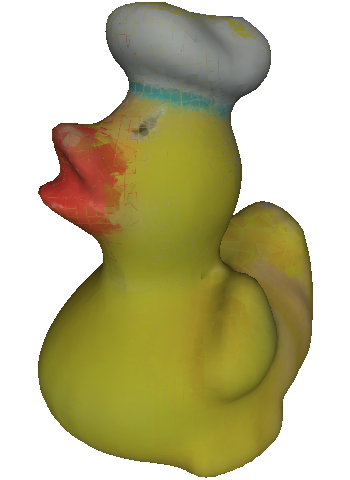
A new feature is the export option of colored meshes. Colored meshes are in a printable format. That means that you are able to send your scan results for example to shape ways.
More information available soon at: https://www.hci.rwth-aachen.de/fabscanpi
To cut a long story short here is a video preview of the new setup in action:
your live dvd for fabscan has been very usefull. please upload the indipendent fabscan installer for ubuntu 15.04.
regard.
pavan
Sorry, but there is no available installer for the FabScan software. Meanwhile the fabscan software is not supported any more. I am writing a new FabScan software which will be released next month.
[…] von einem 3D-Drucker ist es nicht weit zu einem handgeschnitzten 3D-Scanner. Ich persönlich freue mich ja schon auf Geräte, die beides kombinieren. Dann dauerts nicht mehr […]
Hi! Any news on the pi2 FabScan software? We would really love to upgrade our fabscan with it and make it a bit easier to use at our attraktor hackerspace. Grettings from Hamburg!
Yes the official release date of a first version will be 2015-07-15.
So where to get it?
Where to get and how to mount that LED ring?
How to mount the RasPi camera?
I’d really like to upgrade my Fabscan Cube as I never got any decent results from it.
Go to the google fabscan group. You will find a lot of information there, if not ask the people in the group.
You will also find a bunch of information at GitHub. Check out https://www.fabscan.org/
[…] released a new episode of their Youtube show „Hammertime“. In this episode they built a FabScan Pi during they printed something on the Dremel 3D printer. And here is the full […]
Well, we are nearly a moth past the release date, do you have anything new to share with us? I’d also like to buy it as a kit, is there going to be one available soon, or will I have to source all the pieces individually?
Sorry i am very busy at the moment, but i am finally working on the debian packages. You can buy a kit at watterott.com I recommend to buy a Raspberry Pi2 too. The new Software is running on a Pi2. But it is also compatible to the old FabScan CUBE Kit, if the Pi2 is connected to the Arduino and the Logitech Webcam. Alternatively you can connect a Pi Camera instead of the WebCam. The FabScan Pi HAT still has some Bugs and i think it will release it as soon as we can. But as i wrote you can get it also running with the old setup by using an additional Raspberry Pi2. The only difference is that you will have a more ugly wiring.
Sounds great! Looking forward to get our scanner updated. Do you have a new timeframe for the software release?
Any news about the release of FabCan Pi Software?
wfr, kask
Yes. I worked on it every day between chistmas and new years eve. I think i can release an early version in the next days.
There will be a ready to use Raspbian ISO Image. All you need is a Raspberry Pi2 and i highly recommend the Raspberry Pi
Camera Module.
I want to build this for my son. The kit with electronics is sold out. I have plenty pi2. As soon as all the parts are available, please let us know. Thank you.
Ok, ordered the individual parts because the kit isn’t available. I went ahead and ordered the Arduino parts to use with the Raspberry PI. If the PI hat comes out soon, I will use that instead. This is my first PI project so I’ll be a good test case. If I can do it, anyone can. I went online to order the PI camera but saw many different types of PI camera modules. Do you have a model number or link to the one to use? Same question for the 12 LED ring you mentioned. Thanks
Hey you can find all parts you need at http://www.watterott.com
I don’t know when exactly the pi hat comes out. The design
is ready so far, i will ask the manufacturer soon. There
is a standard pi module, which works good. There are two
different official modules. One normal and one called noir.
You need the normal one. I also highly recommend to use the
Silent Step Stick motor driver ( you will find it also at
watterott.com ) because it runs the motor much smoother, so
the objects will not slip or slide on the table.
I am working hard on the release, be patient. Thanks.
There was a software release today!
Hallo Mario,
ich habe ein Problem beim Kalibrieren:
Wenn ich die Kalibrierung anklicke, beginnt der Drehteller an zu drehen–> sehr hohe Geschwindigkeit, ca 3 sekunden( es klingt wie eine Sirene), und dann scheint er zu kalibrieren mit dem Ergebnis: kalibriert.
Die Kalibrierung dauert aber bis zu 10min.
Wenn ich dann etwas scanne, kann ich das Objekt nicht in der erzeugten Punktwolke erkennen.- es sieht alles wie ein rotations symmetrisches Teil aus
Wie kann ich erkennen, ob er die Muster-Vorlage (Schachbrettmuster) richtig erkennt? Gibt es eine genaue Anleitung bzw. ein Video(auf youtube wurde es gelöscht) zur Kalibrierung?
Meine Konfiguration: Fabscan Box,Rpi3 und HAT mit Image 01.01.2020
Gruß Manfred
Hallo,
hast du dir die Frage bereits im offiziellen Forum auf fabscan.org gestellt? Die Frage ist dort besser platziert, da ich hier selten dazu komme die Kommentare zu beantworten. Eine recht umfangreiche Dokumentation findest du hier.
Gruss
Mario