 Reading Time: 5 minutes
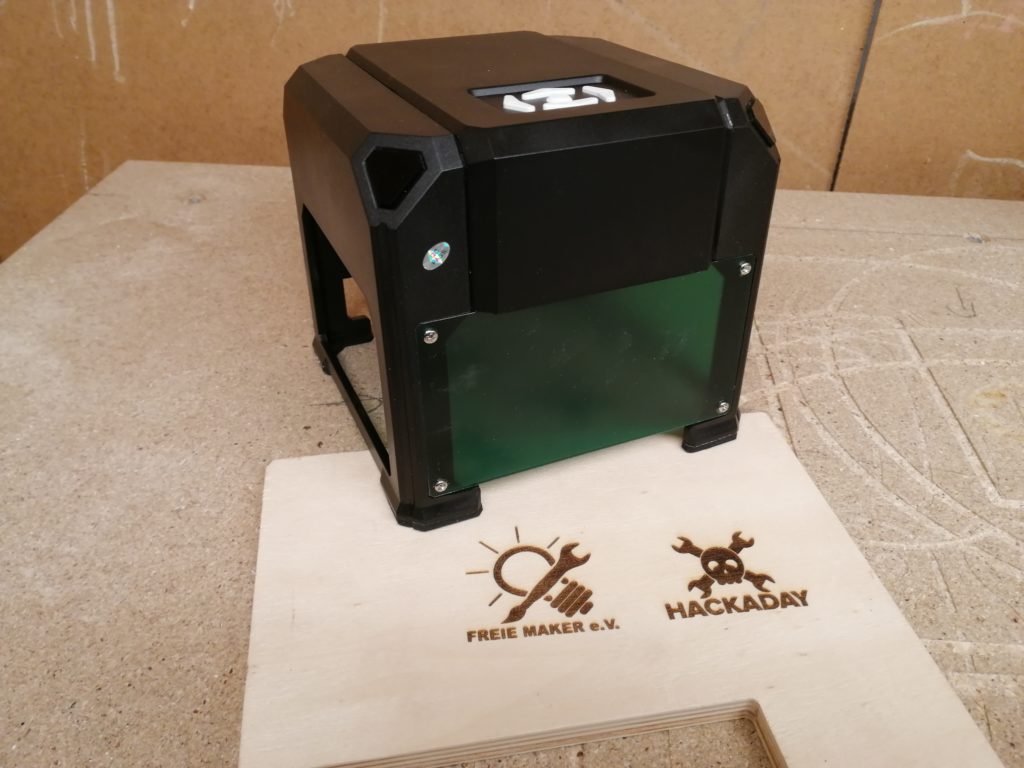
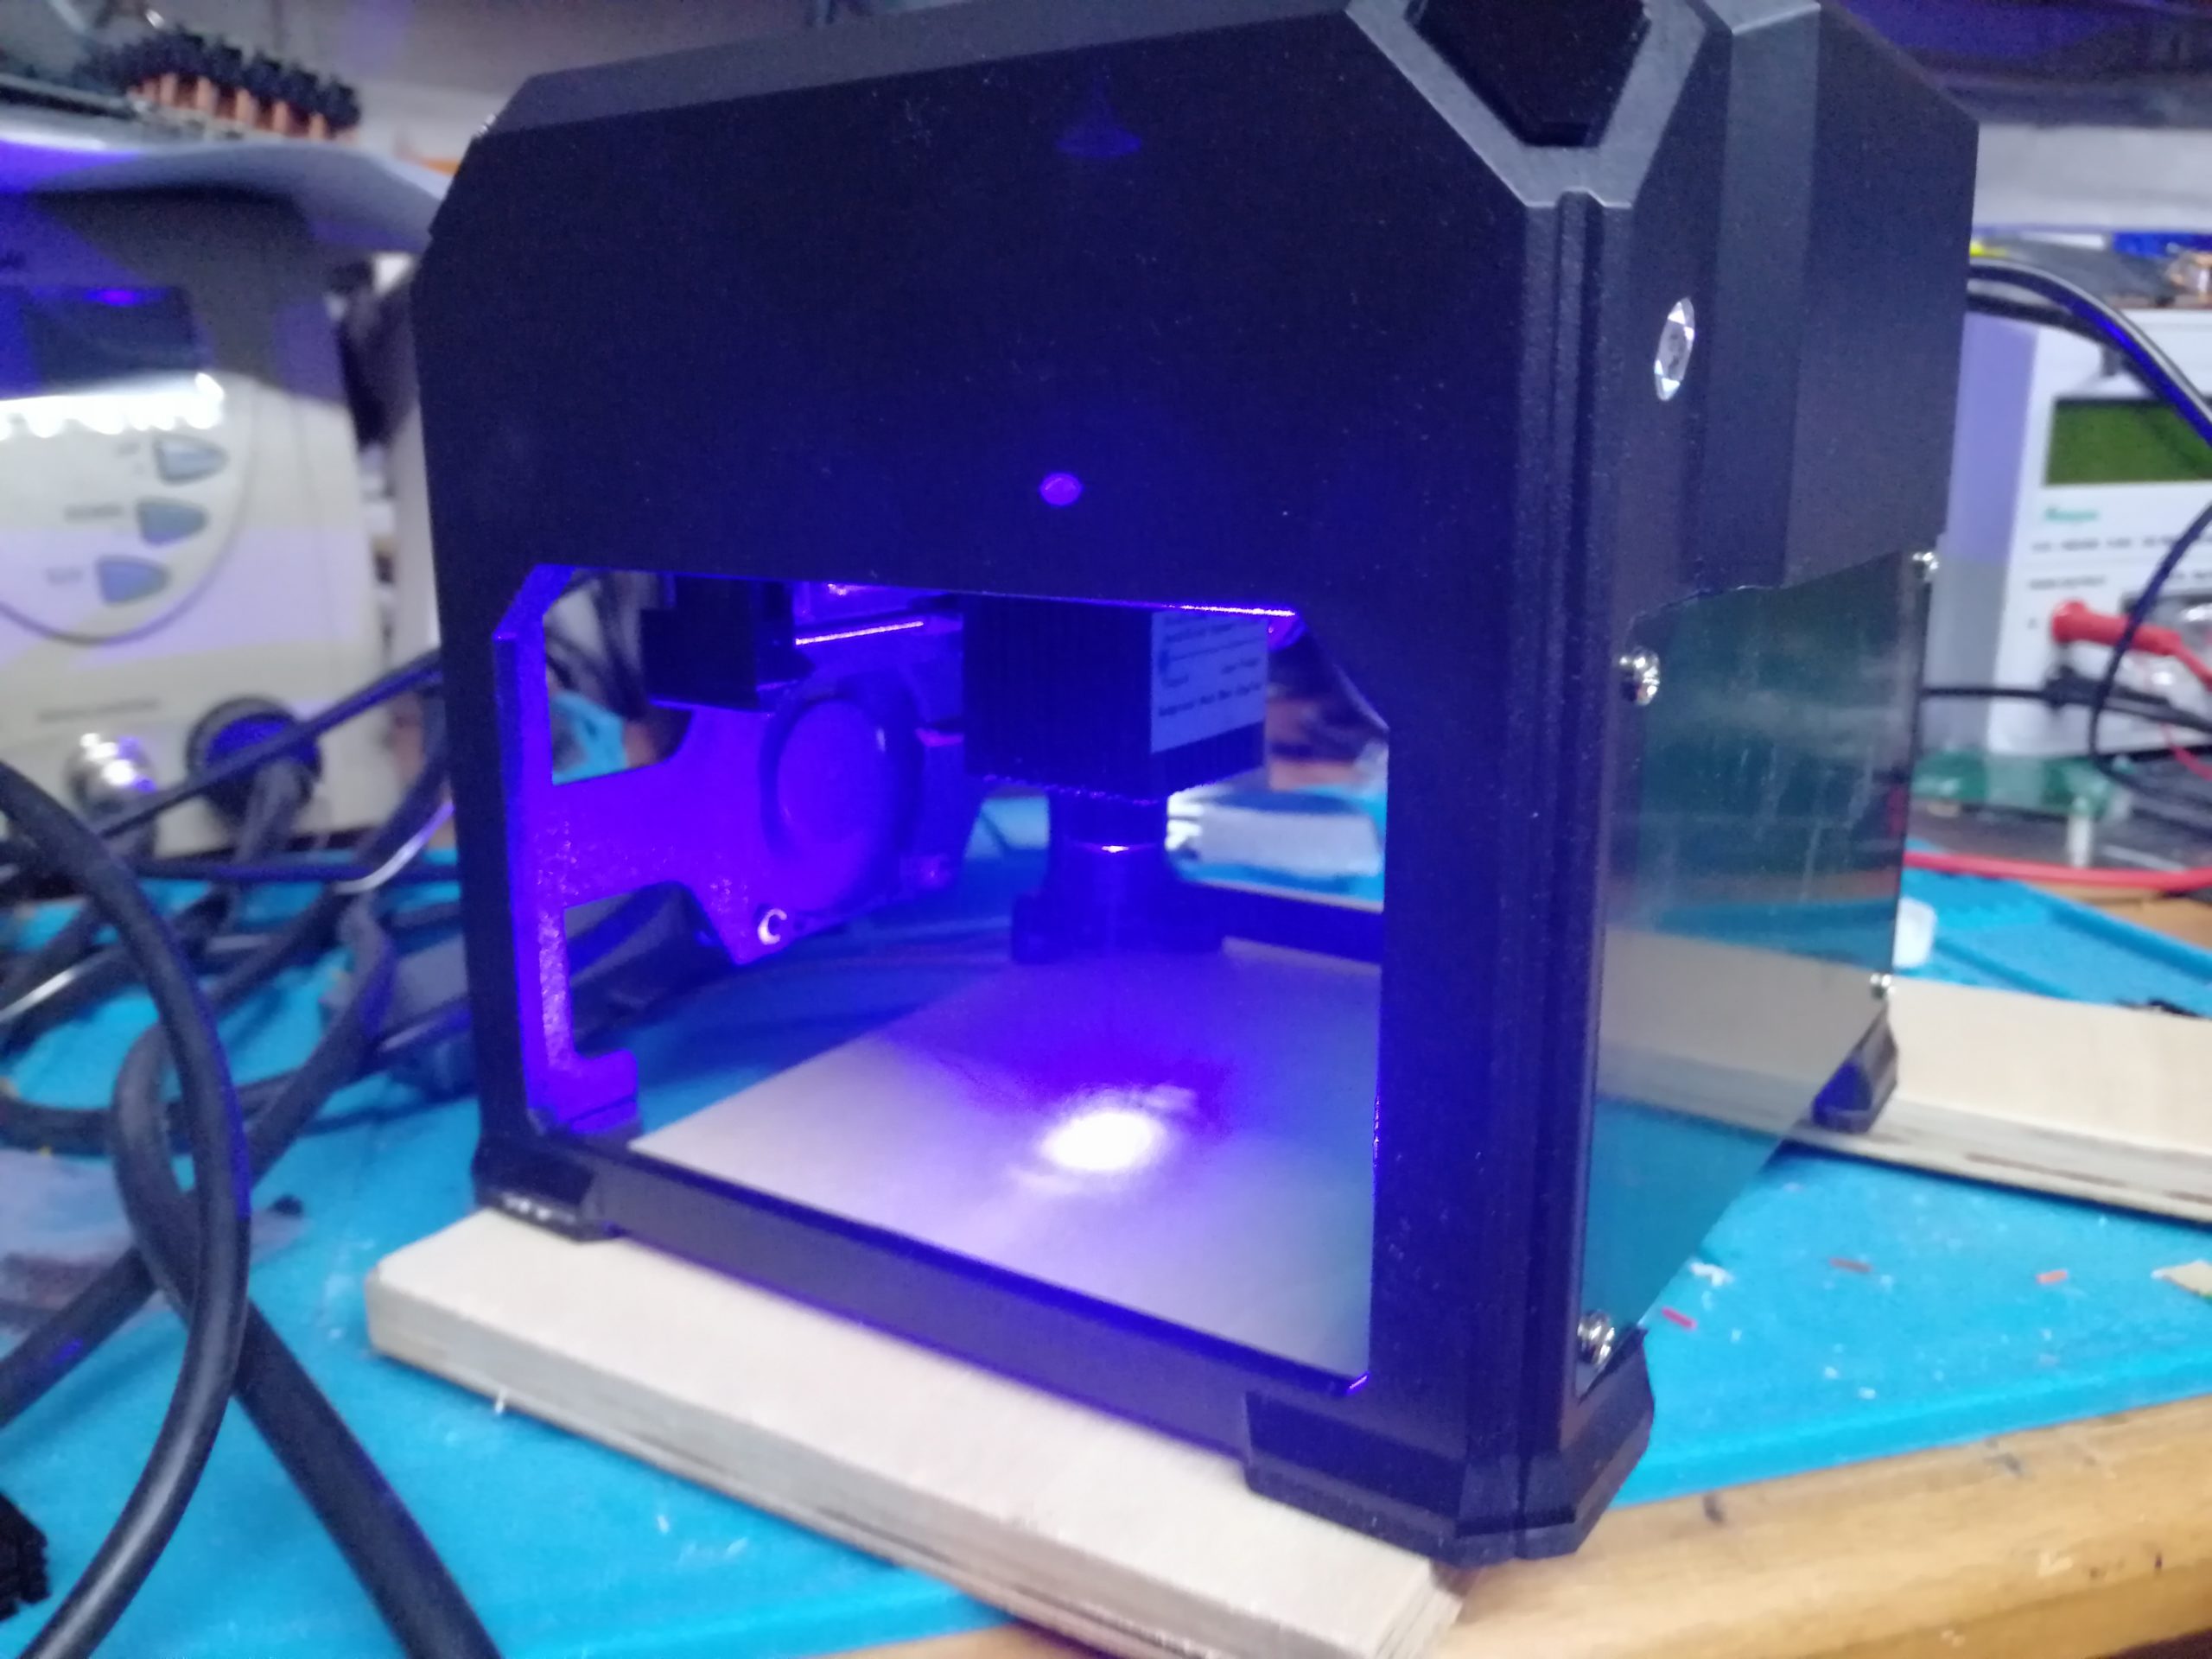
Recently i bought one of those cheap china laser engravers, mostly named K3 or K5 Laser Engraver. It is sold under different names and brands. But watching some Youtube videos confirmed that most of the engravers seem to be the same, even if some of those look different. I don’t know how the people on Youtube got it running, i was not able to find a software which worked for me…
I bought one because i need to do some laser engraving in some of my projects. Normally i tend to use the Co2 laser cutter in our Makerspace. But since the Covid-19 pandemic i am not able to visit our Makerspace because it is closed.
Those small devices are available from 70 € up to 140 €. The price depends on where the engraver was ordered. It is not surprising that the cheapest price is available when it is ordered directly from china. However i got mine from Amazon for time saving.
STOP! Please keep in mind to wear laser safety glasses while operating this machines, they are not as safe as they seem to be!
The Problem
After the engraver was delivered at the beginning of January 2021, i hardly couldn’t wait to try it out. During the unpacking i found a USB stick with the software on it. The stick worked exactly for 30 seconds. I was just able to see what was on it before it died. I thought „Ok, let’s have a look for a website with a software download“. It ended up in a lot of frustrating unsuccessful installations. I even stopped browsing some sites when my browser reported that the pages are untrusted (also happened on „official“ sites of the devices).
The Solution
Long story short, as a programmer i was challenged to find a solution. Some research on the web showed that other people were working on similar approaches. The first option i found was flashing the STM32 controller with GRBL. After reading some comments on YouTube i decided to leave the firmware as it is. On one hand because some people reported that the device was bricked after flashing, on the other hand i wanted to find a solution for people which are less hardware skilled.
The second interesting project i found, was a reverse-engineering project on hack-a-day projects. This looked very promising. I wrote a small python script and sent some of the commands to the device. And luckily it responded. Thanks to Marcel.Ochsendorf for the great work on reverse-engineering the protocol.
Marcels GitHub repository comes with a command line tool for sending images directly to the device. It works fine, but it brings not the best user experience for people without technical skills.
VisiCut comes to the rescue
In our Makerspace we are using VisiCut. VisiCut was started by Thomas Oster at FabLab Aachen several years ago. Thomas is still working on his project. VisCut is open-source and enormous flexible. It bings a lot of cool features like, material database, support for a lot of different laser cutters, visicam (a camera extension for visicut) and and much more.
VisiCut is written in Java. That means it is running on all operating-systems where Java is supported. There are pre-build installers for Windows, Linux and MacOS.
With the work of Marcel (reverse-engineered protocol) and Thomas (VisiCut), i was able to write a driver for VisiCut. At the end i was able to use the Laser engraver on all operating-systems with all the cool features provided by VisiCut.
How to use it?
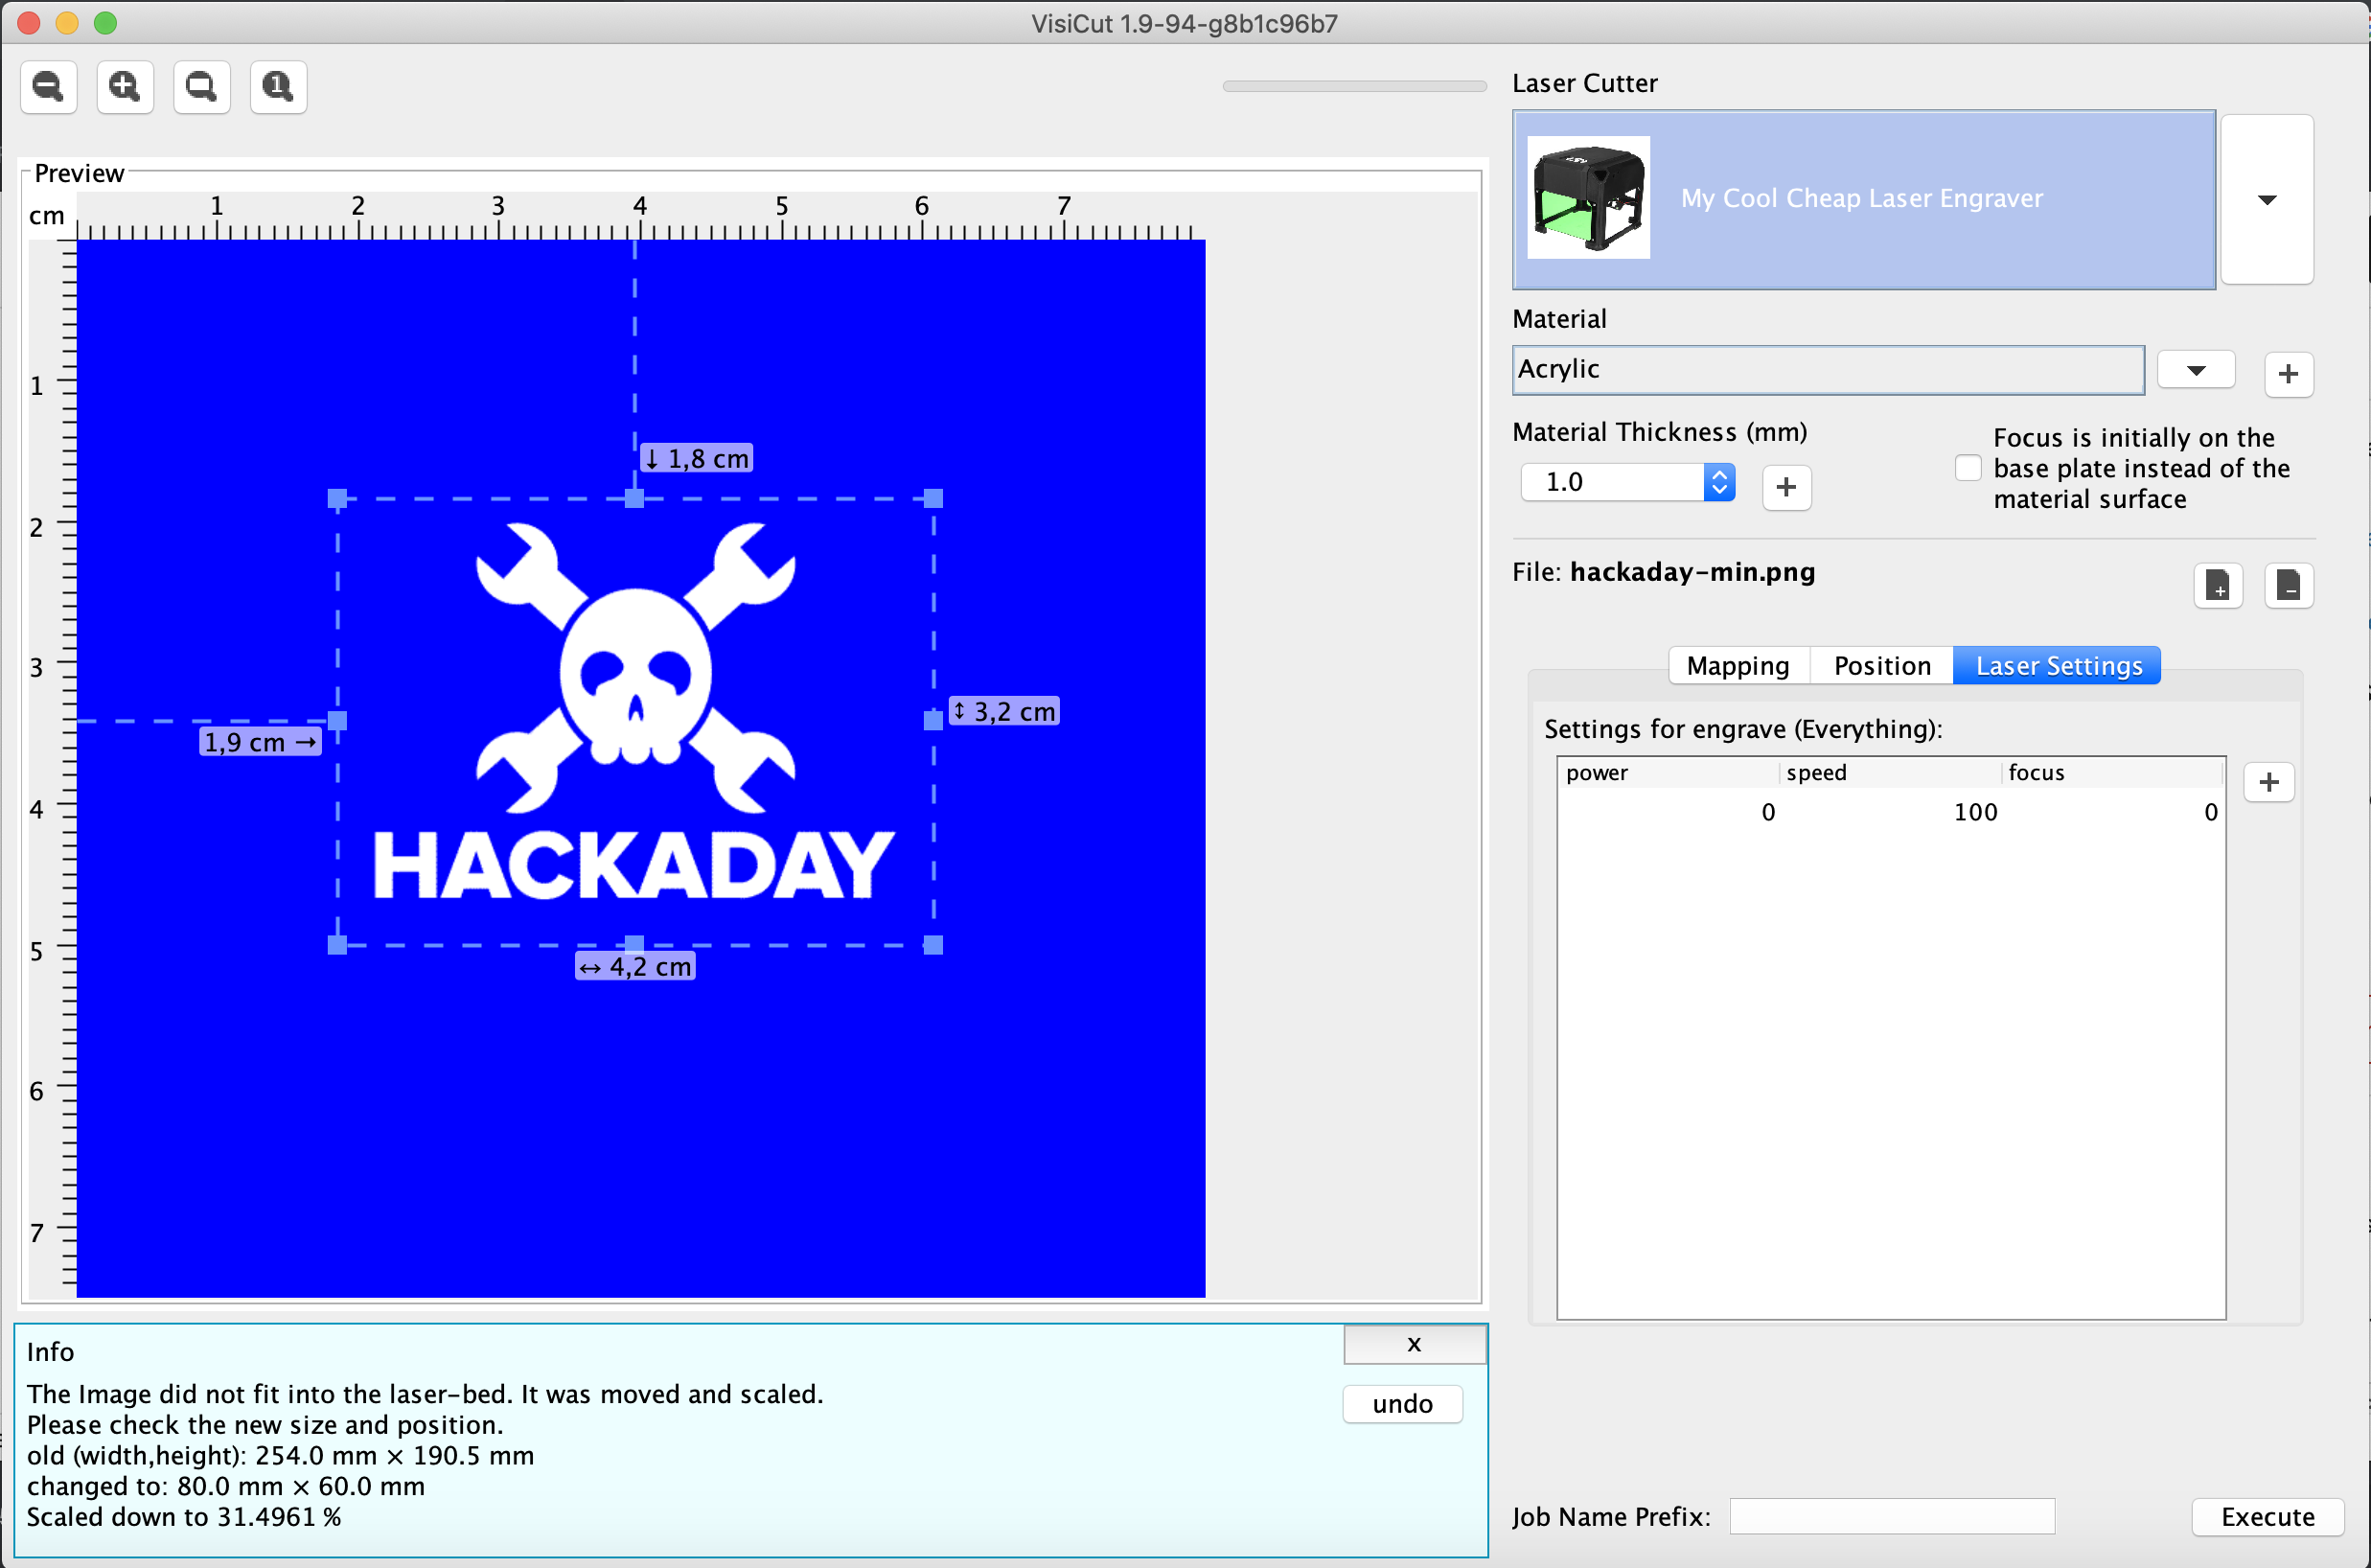
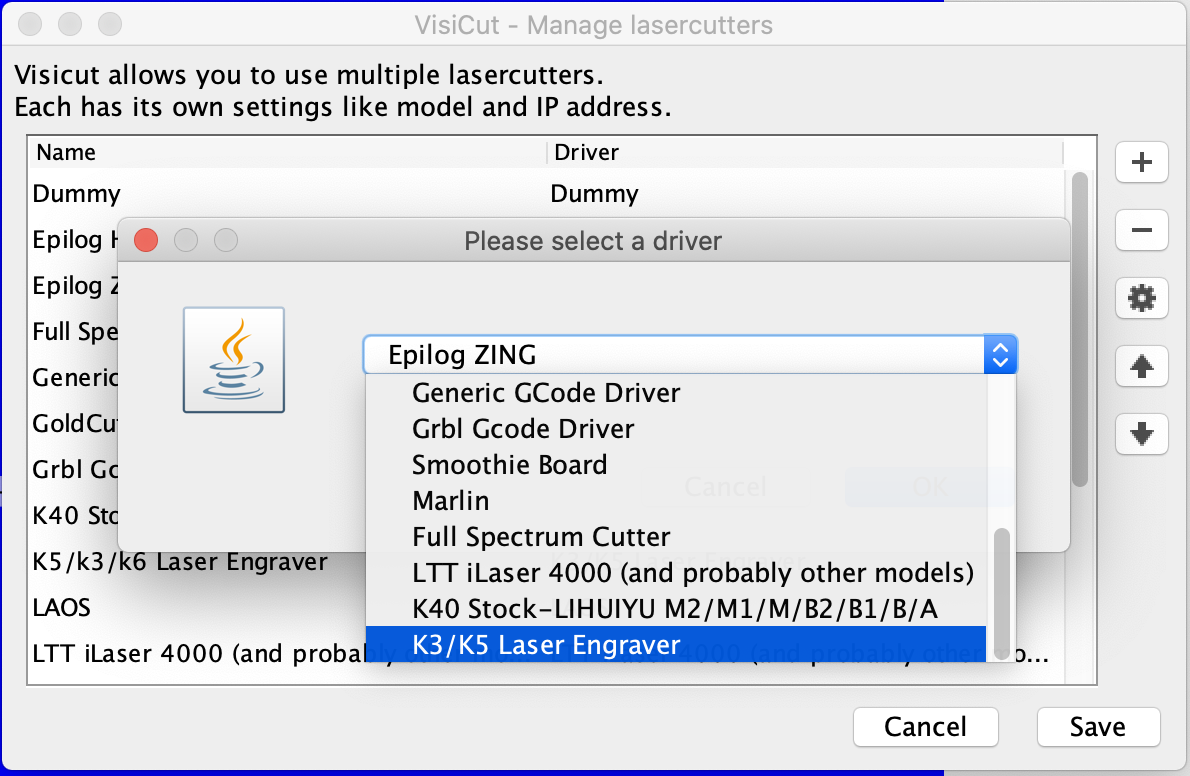
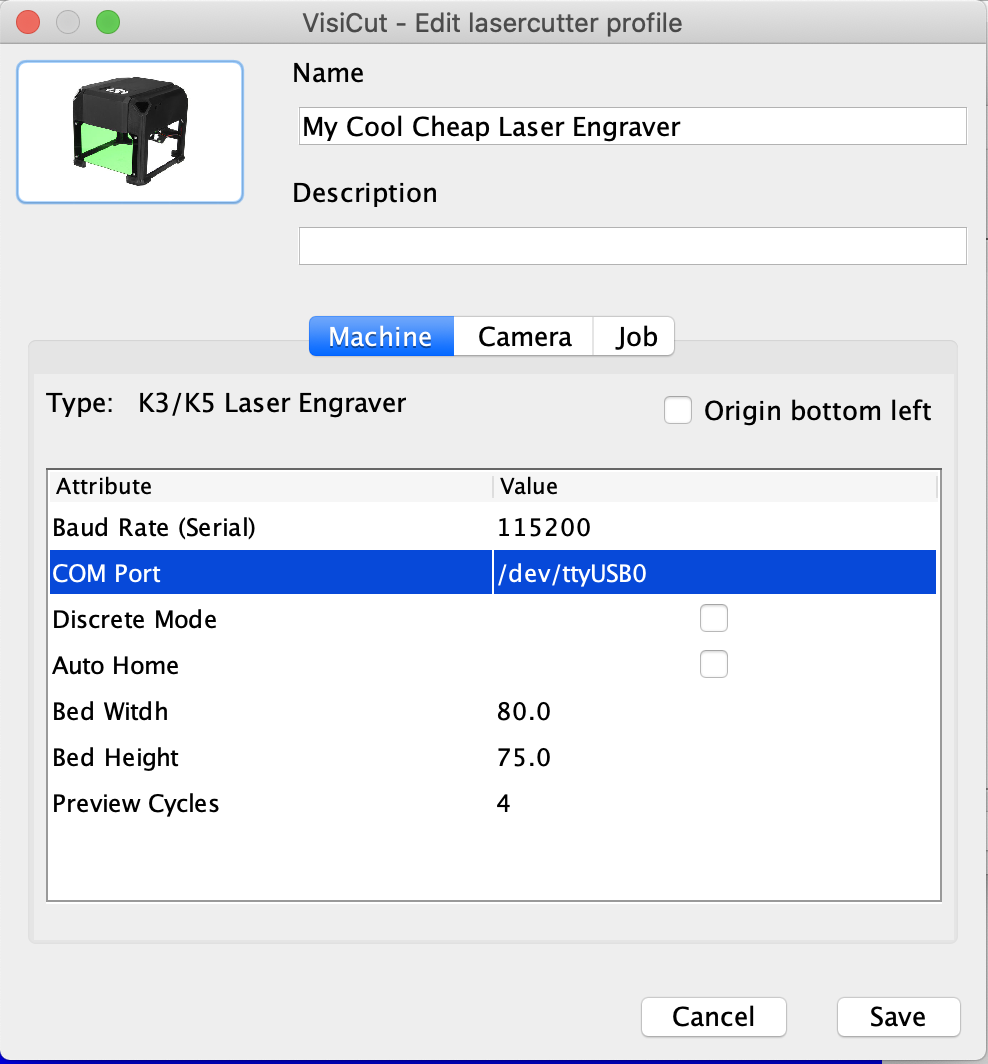
Just download VisiCut and install it on your computer. The K3 (K5 and K6) based laser engraver is ready to use with VisiCut after a new laser cutter with the „K3/K5 laser engraver“ driver is configured. The most important setting is the COM Port attribute. Change this to the com-port where your engraver is connected. On unix based systems like Linux and MacOS it should be something like /dev/tty.wchusbserial143420. On Windows it will be COMx (where x needs to be changed to the real number of the connected COM Port).
The ugly and „hacky“ things…
The Discrete Mode ist something which is defined in the original firmware. What means that the laser is switched on/off for each pixel. This should increase the engraving detail but will even lead to longer processing times. ( I am not sure if it really leads to better results).
Auto home should be deactivated. This setting homes the device before every engraving job. But homing of this device is a pain, because the device doesn’t have any kind of limit switches. Homing is defined by moving the head for a fixed time in both directions. If the axis still was close to the home position before the device will be homed, it results i a loud noisy head crash when the head is hitting the engravers physical limits. I recommend to manually ( turning the rod of each axis) move the head to the zero point before switching the machine on. After the job finishes the axis will move back to its starting position which normally is the zero point. I am sure the moved steps are saved somewhere in the machines memory to prevent head crashing after a job is done.
Another disadvantage of my driver…
One more thing. The original software comes with a „bounding box preview“ feature. When the workpiece is positioned under the machine you can start a mode in which the laser moves along the bounding box of the object what you want to engrave. With this feature you are able to place the workpiece at the exact position where you want to engrave it. During this movement the laser is operating in a low power mode. The laser point is visible but does not engrave. ( I will try to test the VisiCam feature for part positioning in an extra blog post. )
My VisiCut driver provides this feature but it is a little bit hidden/ hacky. You need to set laser power and speed to 0. Afterwards run the laser job and the head moves along the bounding box. It moves as much boxes as the number of preview circles in the laser drivers settings is set. For sure it would be better to integrate a button to VisiCut’s user interface but VisiCut’s driver interface does not support adding user interface extensions at the moment.
Conclusion
If you are a lucky owner of a K3 ( K4 or K6) based laser engraver from china, VisiCut might improve the usage of your device. If you or your Hacker- or Makerspace is owner of a Co2 laser cutter, you should also give VisiCut a try. There are already drivers for the most common used laser cutters (GRBL based, generic G-Code driver, K40, Epilog etc.).
Thanks, using Visicut is an improvement over the included software.
Even though there would be some things to improve (e.g. the possibility to cancel a job in the UI and possibly a better bounding box), the driver helps me a lot.
Many thanks for the work.
How do I get the driver and how do I install it to the VisiCut software?
I also had this issue. My computer wont recognize the Laser engraver
Hi Mario,
habe es mit VisiCut und einem K6 ausprobiert, jedoch ohne Erfolg. Der Laser wird verbunden, wenn ich auf ausführen klicke, jedoch bekomme ich nach kurzer Zeit folgenden Fehler angezeigt:
IOException: Underlying input stream returned zero bytes
Hallo Sebastian, ich habe das gleiche Problem. Konntest Du es lösen?
Gruß Markus
Well, it seems that under Win10, visicut does not connect to the K6. I used a serial device monitor (https://www.hhdsoftware.com/device-monitoring-studio) to check the communication to the USB to UART bridge and the software does not initiate communication. It should follow these rules: https://www.silabs.com/documents/public/application-notes/an197.pdf. However, the chinese software does properly speak to K6 over the COM port. (I have not check the Linux or Mac version). I wonder, what needs to be fixed in the code.. although, I am not a coder.
Hallo, ich bekomme die gleiche Fehlermeldung
Hi readers,
Does anyone know THE solution for other software for the Wainlux K6, I have tried lightburn and visicut without any success. I found a solution here but I am not getting anywhere. I use an Imac with Catalina, it uses the usbport for the K6 /dev/tty.SLAB_USBtoUART and /dev/tty.usbserial-0001. does anything else need to be installed.
With kind regards,
Henk de Sain
Hi,
I have a Wainlux K6 and installed Visicut as per your advice. But it keeps giving me the following error.
IOException: Underlying input stream returned zero bytes
Laster cutter works well with factory software. It doesn’t connect with Visicut. What can I do to fix this? Do I have to install a different driver?
Please help
Thanks
Madz
Hi!
Thanks for the efforts. Unfortunately I was unable to run the visicut on
– windows
– ubuntu
– debian
device was already in use in all systems.
Of course I’ve multi-checked against that, so that is an invalid error.
Nor COM3: nor /dev/ttyUSB0 were in use.
Hi, My usb also failed to work so I’m looking into other ways to make it work. I have Visicut now but everytime I want to execute I get a error IOException: Underlying input Stream returned zere bytes
any idea how I can fix this?
Same here…
Linux Mint and K6 engraver. Software version just from last night…
Tried this and get the same error reported above:
IOException: Underlying input stream returned zero bytes
Working with this again, it seems like at one point it was definitely communicating with the engraver. Additional options on the laser setting appeared, „connected“ appeared at the top, etc. But after throwing the first error, it will no longer connect. Despite using the same port settings, disconnecting and reconnecting the engraver, and turning it on and off, it never again appeared to be actually communicating with the program.
Back to the miserable phone-based version.
On my Wainlux K6 i get the Error:
IOException: Port in use: COM3
Any help????