 Reading Time: 3 minutes
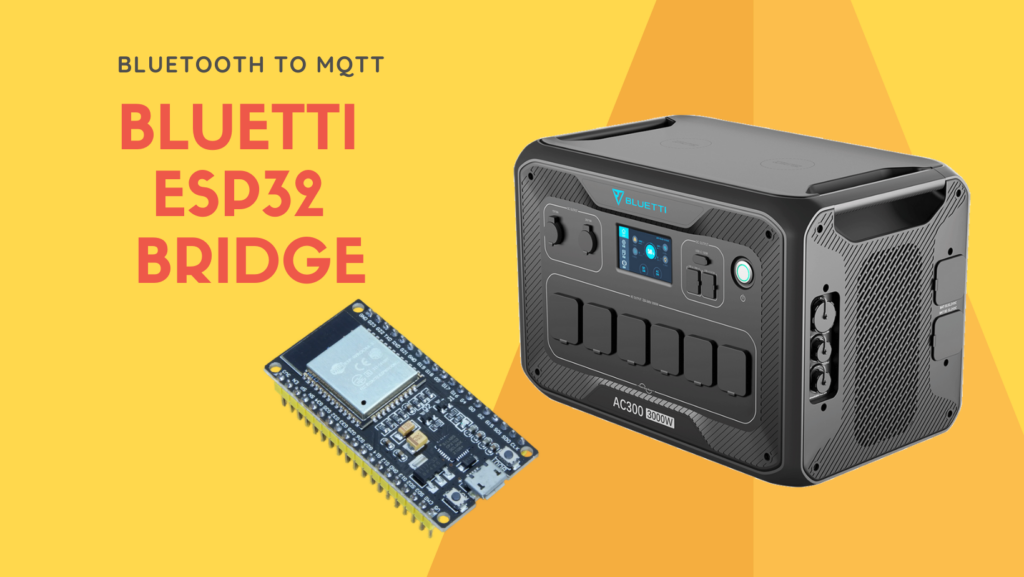
I just bought a BLUETTI AC300 + B300 . It is a very cool Gadget but unfortunately it is not smart enough to connect it to my ioBroker installation out of the box. Some BLUETTI power generators have an integrated Bluetooth interface which can be controlled by using the official BLUETTI app. My AC300 unit also provides a WiFi option, but i never tested the WiFi interface. Due the Wifi control requires internet and connects to BLUETTI servers/cloud i decided to use Bluetooth for this project.
After a couple of days searching the internet for a ready to use solution, i found a really nice project based on Python which does exactly what i was looking for [1]. Except this one thing…
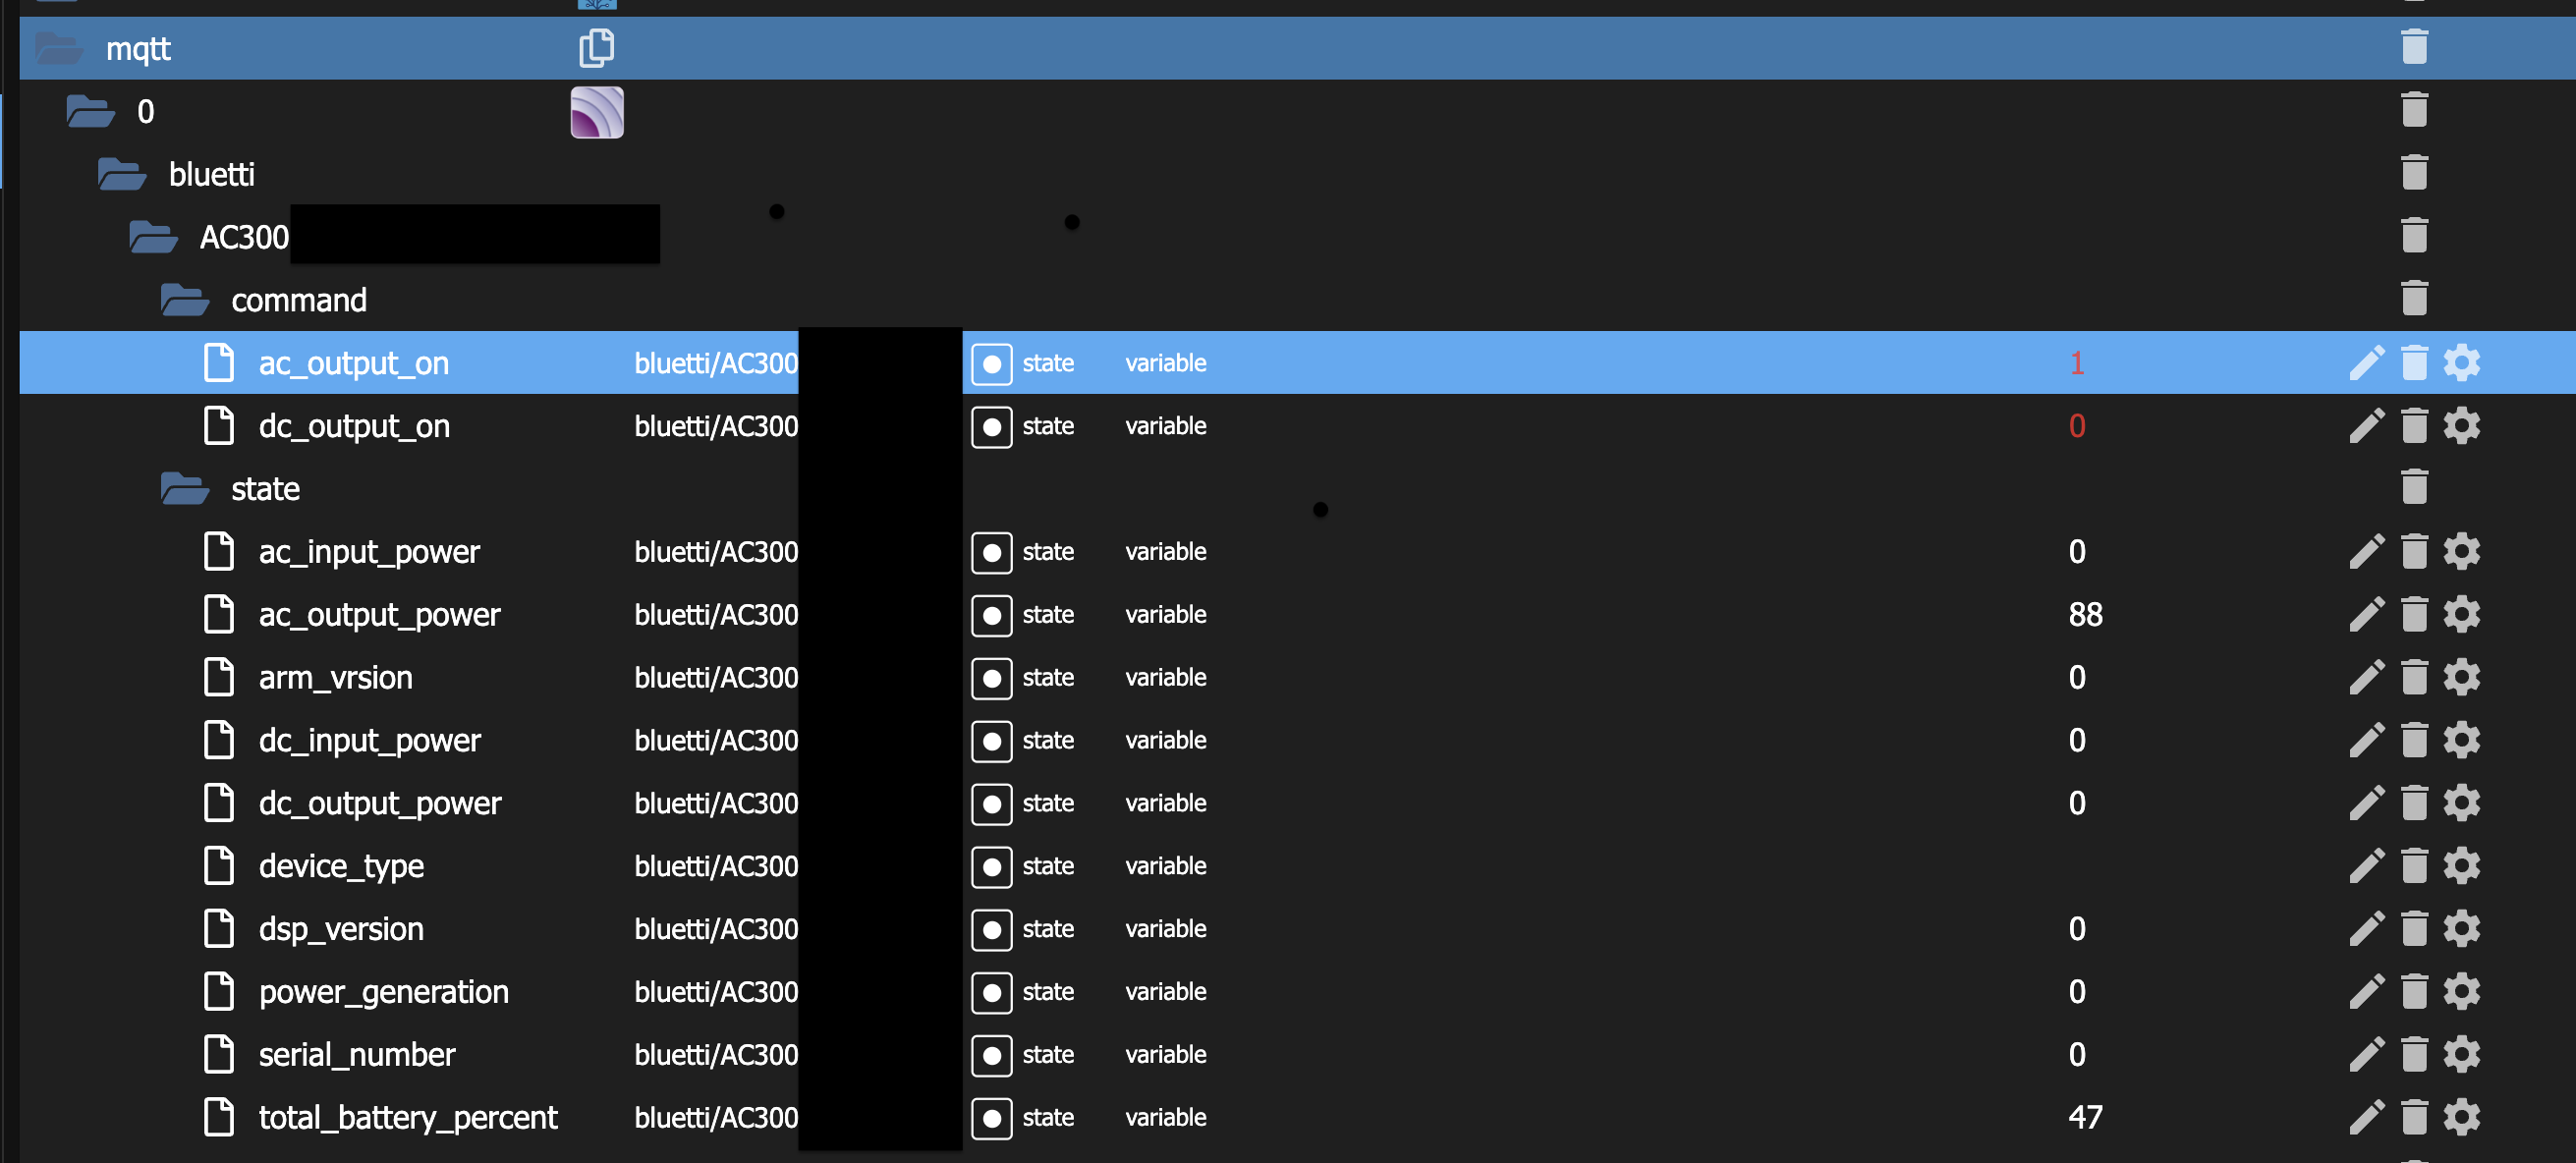
The project already supports a whole bunch of BLUETTI power stations. It also is able to send all the stuff to a MQTT server (Home Assistant Integration). I did not test the project itself. Just studied the code and tried to understand how the BLUETTI Bluetooth protocol is working.
The Bluetooth protocol
After some further research on this project, i found a forum where some guys discussed the process of reverse engineering the protocol [2]. So most of the interesting and hard work was already done by those guys. At this point I need to say „Great work and thank you so much for it“!
Since i am more a fan of the ESP32, because it brings Bluetooth and WiFi already in one device without the need of an heavy operating system i tired to port the code more or less to C++. All basic functions are already working with my AC300 + B300 unit.
How it works
Just flash the firmware to an EPS32 and connect it to a 5V power supply, best power supply in this case would be your BLUETTI power station. Afterwards have a look for the ESP32 WiFi hotspot and connect to it. The WiFi configuration Manager should to the rest of the work.
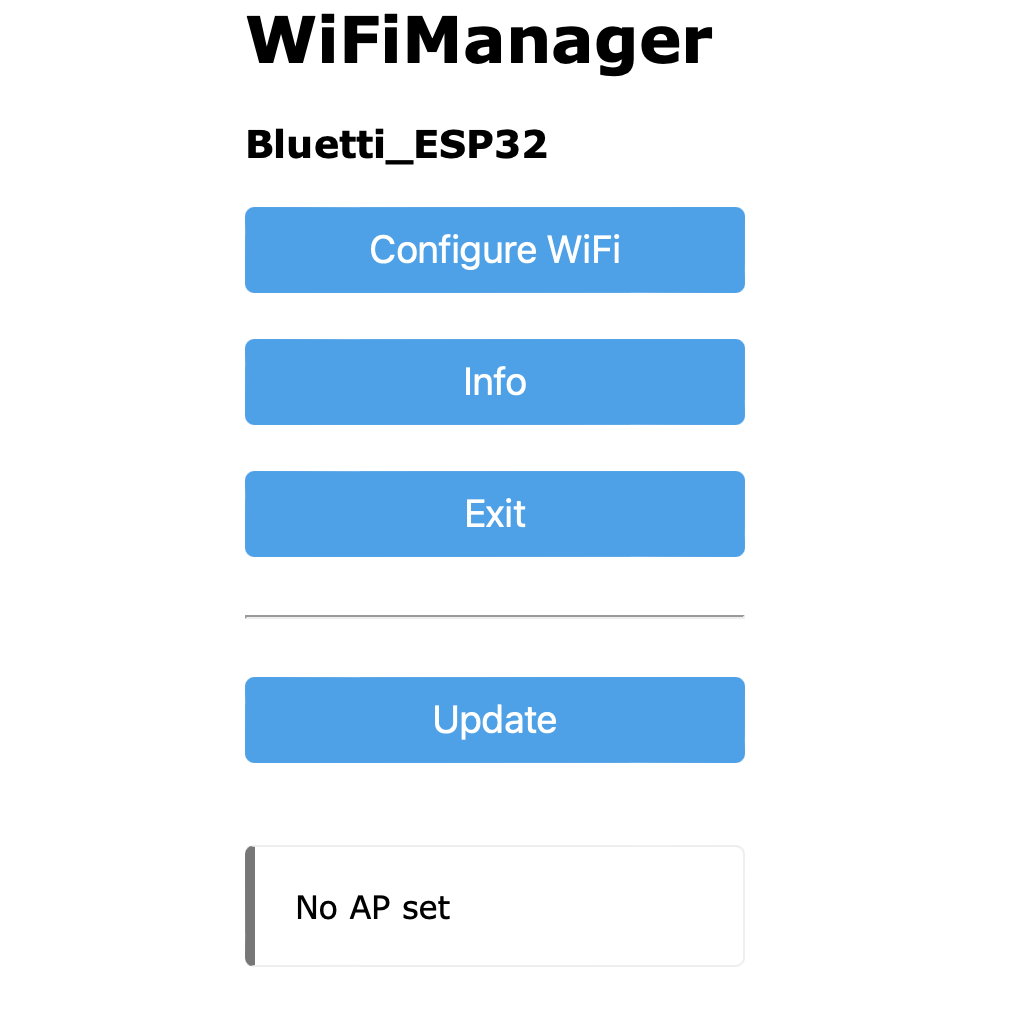
Select „Configure WiFi“.
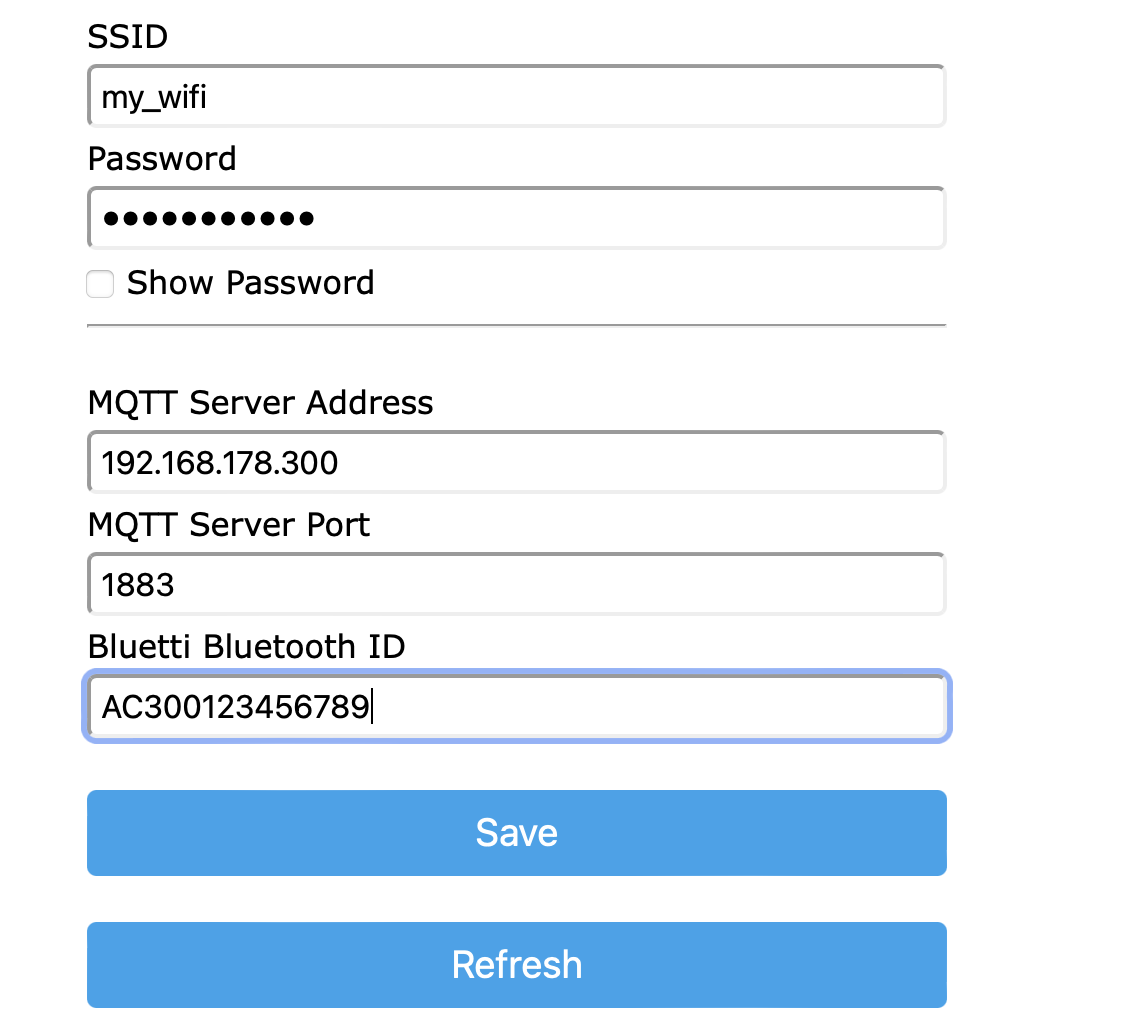
Now configure enter your WiFi credentials, MQTT server/port and BLUETTI Bluetooth device Id. Save it and restart the ESP32. The ESP32 will connect to your BLUETTI device and starts to send the current state to the MQTT server.
Customizing the project
It should be easy to implement the protocol for the other units. All you need to do is to have a closer look to warhammerkids repo. There are a bunch of files with definitions for the other BLUETTI devices. I decided to keep my code as modular as possible. There are files called Device_xxxxx.h where the protocol specific values for the Bluetti device are defined.
Adding a new Device should be straight forward. Just create a new Device_<device_name>.h file, transfer the protocol for your device from [1] to this new file. Change the config.h to fit this device and compile the code for your device. That’s it.
I know that the project needs some more documentation and its in an early stage, but maybe is helpful for you. Feel free to leave a comment and/or commit some code.
And finally the disclaimer
Don’t touch these firmware if you don’t know how to put the device in the programming mode if something goes wrong. As per the GPL v3 license, I assume no liability for any damage to you or any other person or equipment.
Before i forget here is the link to the GitHub project: https://github.com/mariolukas/Bluetti_ESP32_Bridge
[1] https://github.com/warhammerkid/bluetti_mqtt
[2] https://diysolarforum.com/threads/monitoring-bluetti-systems.37870/
Hallo Herr Lukas,
ich selbst nutze den IObroker für verschiedene Themen auszulesen und in smart Home zu verarbeiten. Das Thema mit den ESP32 Prozessoren ist sehr interessant. Danke für den Beitrag.
Gibt es dir Möglichkeit, dass Sie mir hier helfen und ein nen solchen ESP 32 für mich Flashen mit der hier genannten Software, da ich mich hier nicht auskenne?
Ich nutze die bluetti AC 200 Max und möchte diese wir hier beschrieben in IO Broker einbinden.
Vielen Dank ich würde mich auf eine Antwort freuen.
Gruß Rainer Licht
Genau was ich gesucht habe, für meine AC200M POwerstation
Hast mir sehr viel Zeit erspart, die Kinder freuen sich.
Ein paar kleine Fehler scheinen noch drin zu sein.
Z.b.:
-) Es werden nur die ersten 10 Status-Werte im Array per MQTT übertragen angelegt.
-) Die Command Befehle werden nicht im MQTT Server angelegt.
Beste Grüße
Reinhard
Ich hätte auch gerne die Werte meiner AC300 in Home Assistant … nur, mit der Beschreibung hier und in Github bin ich leider total überfordert, die Erklärungen setzen immer mittendrin an, ich scheitere schon damit: „Flashen Sie einfach die Firmware auf ein EPS32 … “ sorry 🙂
Nach tagelangem lesen und probieren ist es mir wenigstens irgendwann mal gelungen einen ESP32 über ESPHome in den Home Assistant zu bekommen … dachte mit ESPHome ginge es dann einfacher …. Pustekuchen, ich komm einfach nicht weiter 🙁
Gibts irgendwo ein Tutorial, dass mir auf einfachem Weg zeigt, wie ich die Bluetti_ESP32_Bridge zum laufen bekomme?
Vielen Dank