In the last part I wrote about some changes to the build and a little about the electronics I installed. This part is meant to be the last one in this series for now, since the printer is working quite well by this point. Of course I’ll keep reporting on small modifications and fine-tuning. In this part I’ll write a bit about the software I use.
Firmware
In the previous part I already mentioned that I went with the Teacup Firmware as the firmware for the Arduino. I chose this firmware mainly because it still just about fits on an Arduino UNO (or compatible). On top of that, it is written entirely in C and gets by without any Arduino libraries, yet it can still be installed on the Arduino through the Arduino IDE without any problems. So it is possible to use a small Arduino instead of the Arduino MEGA, which saves a few euros. A well-made site for working out the most important firmware values is the RepRap Calculator by Josef Prusa.
Control Software
To control the 3D printer I use Printrun. Printrun comes with a few tools that make handling G-code easier. To control my printer I use the program Pronterface, which is part of the Printrun package. When you start the software, you get a simply designed interface that makes any 3D printer easy to operate. Pronterface runs on Windows, Linux and Mac.
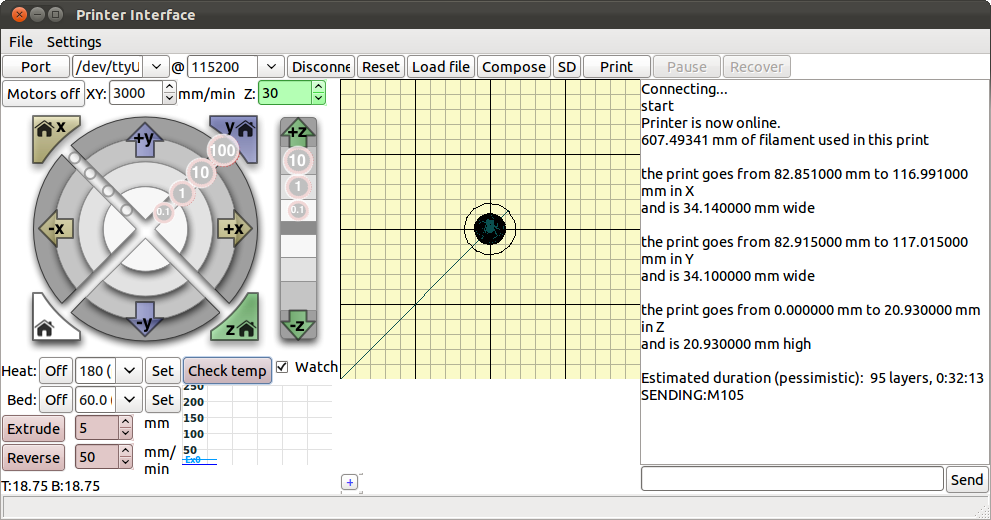
Pronterface is largely self-explanatory and doesn’t need many words. The software can be used to move the axes individually or to feed the printer with G-code. Manual axis control is done with the arrow icons on the left-hand side. On the right-hand side there is a text box that displays status messages. In the line below it you can send G-code commands to the printer directly, line by line. Files can be loaded with the Load File button. Pronterface can load G-code files. If a slicer such as Skeinforge or Slic3r is configured in Pronterface, STL files can be loaded as well. Slicing then happens automatically. As my slicer I use Slic3r.
Slicer
A slicer is used to generate G-code from the 3D object files (e.g. STL). As described above, I went with Slic3r, because Skeinforge, which is also widely used, seemed too complex to me for getting started. Slic3r offers an easy way in, especially for beginners, since many of Slic3r’s overall settings are already calculated from the basic settings. I’ve made an export of my configuration available in the download section. It’s still a good idea to use Slic3r’s configuration wizard. It runs on first start and asks for a few basic parameters of the printer (e.g. nozzle diameter).
After the initial configuration with the wizard I was already able to get usable print results.
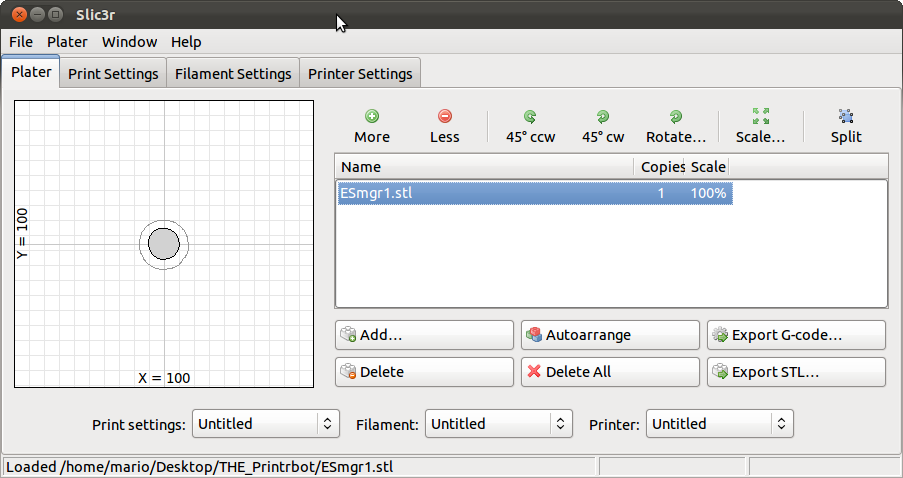
In combination with Teacup, however, you should select RepRap as the G-code type. I tried selecting Teacup several times, but that didn’t work out. To improve the print result you have to play around with the Slic3r values. It’s also worth taking a look at the tutorial on setting up Slic3r.
How the Software Works Together
To start a print, I load the STL file I want into Slic3r and then click Export G-Code there. After a while a G-code file has been generated. Now I start Pronterface and connect to the printer with the Connect button. Then I load the generated G-code file. After that I switch on the hotend and the heatbed. Once the desired temperature (heatbed: 60°C, hotend: 180°C) has been reached, I start the print with the Print button.
Summary
Here are all the parts again at a glance:
Part 1 – The Beginning
Part 2 – Mechanical Build, Part 1
Part 3 – Mechanical Build, Part 2
Part 4 – The Electronics
Part 5 – First Print Results
Parts used:
- 1x Arduino
- 4x EasyDriver
stepper motor drivers
- 1x Heatbed
- 1x J-Head Hotend
(0.4mm)
- 1x Wade Extruder
- 1x old scanner
- 1x old inkjet printer
- 3x limit switches from old printers
- 1x old PC power supply
- 1x timing belt
- various ball bearings
- scrap wood from the hardware store
- various screws and brackets from the hardware store
The following video shows the printer printing.
Comments