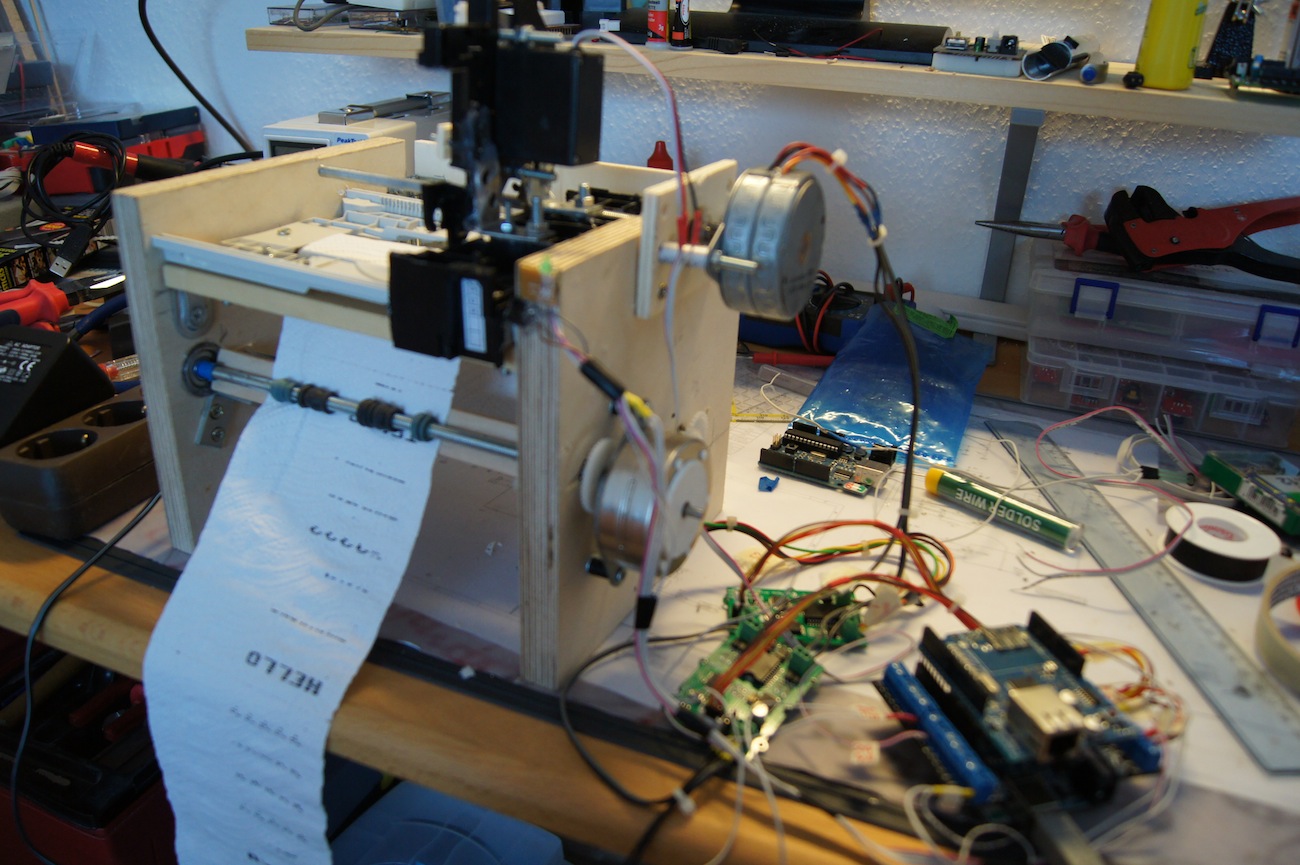
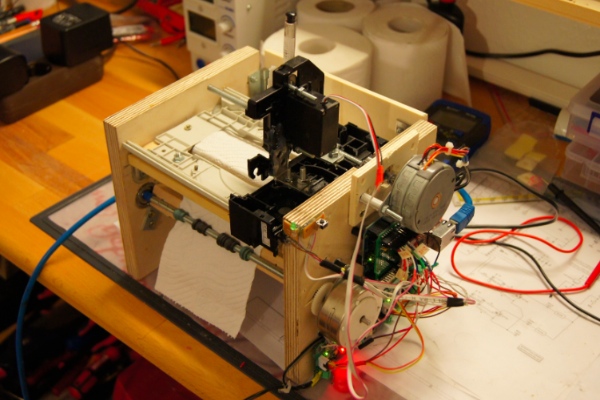
This year Heise is running its c’t contest “Mach flott den Schrott” (roughly: “get that scrap running again”) for the second time. Finally a reason to actually build a project that had been buzzing around in my head for quite a while.
The result is the toilet paper printer. The printer has a network connection, so it can print RSS feeds, tweets or Facebook messages, for example. When it comes to printable text sources, there are no limits to your creativity. In the following text I’ll try to document the build of the printer as well as I can. Questions and suggestions are welcome in the comments.
Planning and sourcing the materials
One thing was clear from the start: I needed two or three steppers. So first of all I pulled those out of several printers I had found in the bulky waste. Since CD-ROM drives also contain somewhat smaller steppers, I took apart several old CD-ROM drives right away as well. As it turned out later, I could even take most of the parts from old CD-ROM drives. Gears, timing belts and everything else that looked halfway usable went into a box too. For the design I first thought about a kind of CNC principle with 3 axes. Moving the roll forwards and backwards was supposed to be one axis, moving the print head right and left the second axis, and raising and lowering the pen yet another axis. This first idea later turned out to be very hard, if not impossible, to realize (in the short time available). While tinkering I then came up with the idea for the variant I actually built, in which there is only one feed and the text is printed line by line. I also thought of a model servo for lowering and raising the pen right away. Since I found out by chance that an old drain pipe that was still lying around had exactly the right diameter, I didn’t have to worry much about the roll holder any more either.
What was still missing was a bit of wood, screws, nuts, hinges, brackets and other odds and ends. I found most of that at the hardware store. Luckily, its box of wood offcuts also had suitable pieces for the frame. For the shaft bearings I almost bought new ball bearings. Here, too, I found a cheap solution in a few inline skate wheels that I managed to rescue from the trash. Last but not least, the whole thing had to be controlled somehow. To save time here as well, my solution to this problem was clear: an Arduino together with motor drivers would control it all. And to make everything perfect, the printer of course needed a network port. For that I had an Ethernet Shield from Adafruit in mind.
Here is the complete list of parts and materials used once again:
- Tray with frame/mount from a CD-ROM drive
- Rubber mounts from the mechanics of CD-ROM drives
- Read head mechanism from a CD-ROM drive
- 2 x steppers from 2 printers
- Limit switch and LED from a CD-ROM drive
- Gears from CD-ROM drives
- Wiring from PC cases (ribbon cables/mainboard connectors)
- Threaded rod from the hardware store
- Small parts from the hardware store such as screws, hinges, brackets
- Wood offcuts from the hardware store
- 5x ball bearings from inline skates
- PVC drain pipe from the bulky waste
- 2x wall power supplies, 12V and 5V
- 1x pressure sensor
- 1x model servo
- 1x Arduino with Ethernet shield
- 2x Twig I2C motor drivers
Building the frame
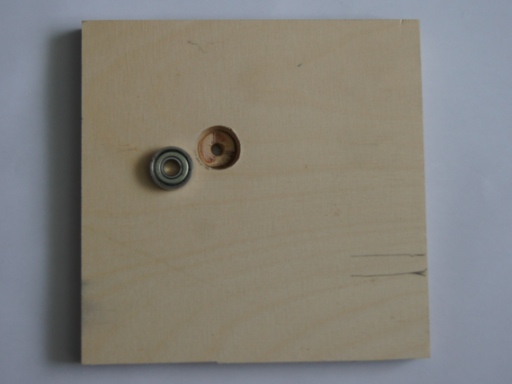
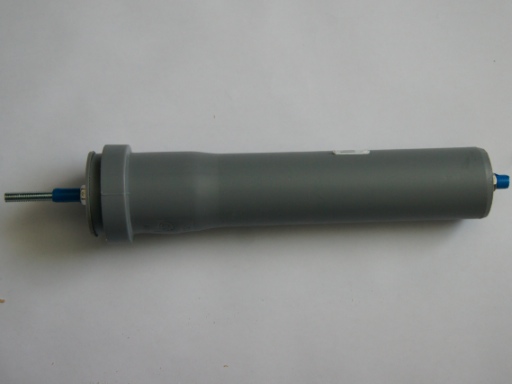
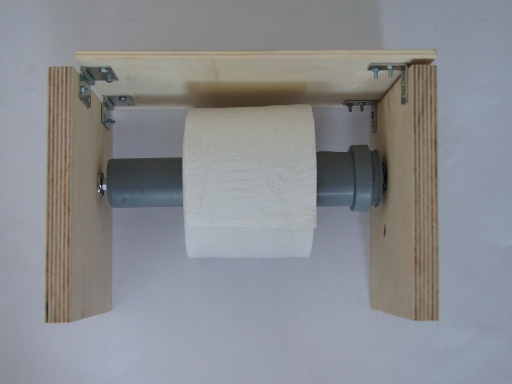
For the frame that was to carry the printer’s mechanics, I cut the wood offcuts from the hardware store to size. First two side panels of 170 mm x 170 mm from a board. Then the back panel from plywood, measuring 180 mm x 170 mm. The parts were joined with hinges on the left side and with 2 brackets on the right side. The hinges later allow the left side to be folded open so the toilet paper rolls can be changed quickly and easily. The left picture shows a side panel in detail. Using a hole cutter, I drilled holes for the ball bearings into the side panels. The holes were not drilled all the way through, but only deep enough for the ball bearings to sit flush in the wood. The middle picture shows the prepared roll holder. For this, the PVC pipe was closed at both ends with wooden discs. I also cut those out of a board with a hole saw and then drilled holes for the threaded rod into them. The whole thing was then glued together with superglue and the threaded rod fastened to the pipe with nuts. The right picture shows the finished assembly. Since the threaded rod is only 6 mm in diameter but the ball bearings have an inner diameter of 8 mm, I improvised a fit with electrical tape here.
Building the print head guide
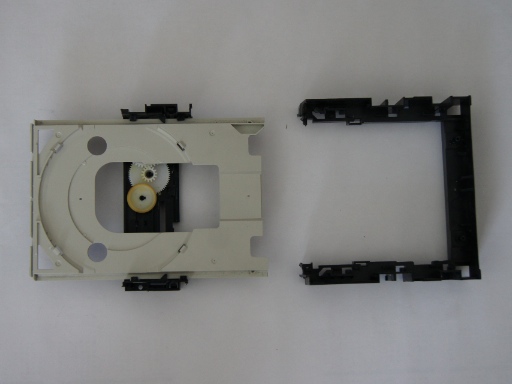
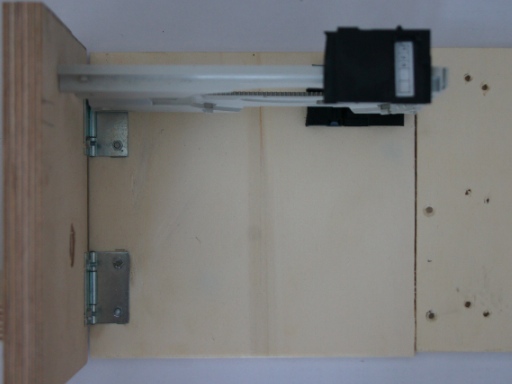
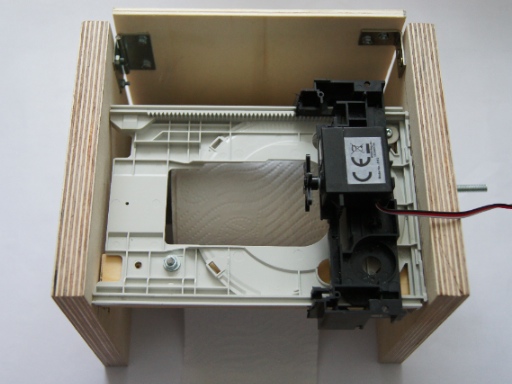
At first I wanted to use a ready-made guide from an old printer as the guide for the print head. But since that turned out to be too complicated, or rather the printers I had available weren’t really suited for salvaging matching parts, another idea was needed. It was to use the read head mechanism of a CD-ROM drive. This part would have been perfect if its travel weren’t too short. With a travel of just 50 mm I couldn’t even have written on half of a toilet paper roll. Too bad. I kept the properties of this part in the back of my mind, though, because, as it turned out later, I could still put it to use. The solution to the problem of building a suitable guide had been lying in front of me the whole time, it just had to be sawn to size first. The right picture shows the tray of a CD-ROM drive together with its frame, which I sawed down to a width of about 50 mm. The right picture shows the complete frame assembly with the tray installed. In the photo you can already see the servo that was later supposed to hold the pen. Since I wanted to raise and lower the pen as straight as possible, the CD-ROM drive mechanism mentioned above was made for the job. After a few hours of fiddling and frustration I finally managed to glue 2 CD-ROM drive mechanisms together into one part. The following video shows the first test with this part.
Moving the print head
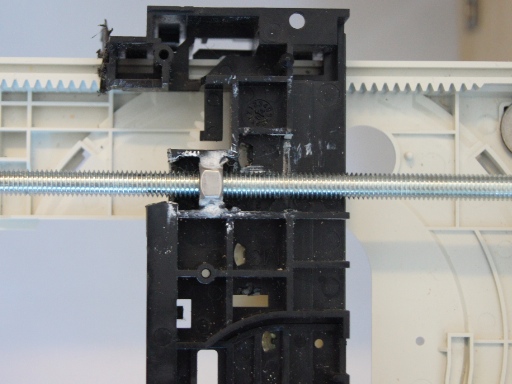
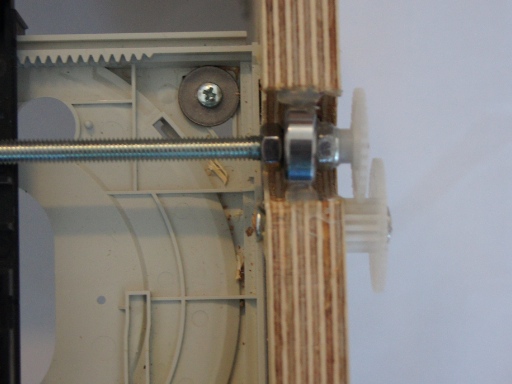
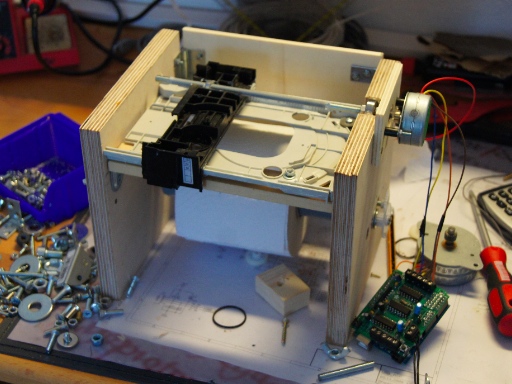
To get the whole thing moving, I glued a nut onto the frame piece of the CD-ROM drive with superglue, as the left picture shows. Then I sawed off a piece of the threaded rod to a length of about 210 mm. On the printer’s frame I again used the hole cutter to drill a recess for another ball bearing. The ball bearing was glued into this recess. This time with hot glue, though, so that I could adjust its height more easily. The threaded rod was screwed into the nut and passed through the ball bearing. Here, too, I improvised a fit with electrical tape. So that the threaded rod can’t work its way out, two more nuts were screwed on, one in front of and one behind the ball bearing, and finally fixed with superglue. After that, all that was left was to screw on the motor. To connect the threaded rod to the motor shaft, I used a matching piece of tubing as a coupling.
Building the paper feed
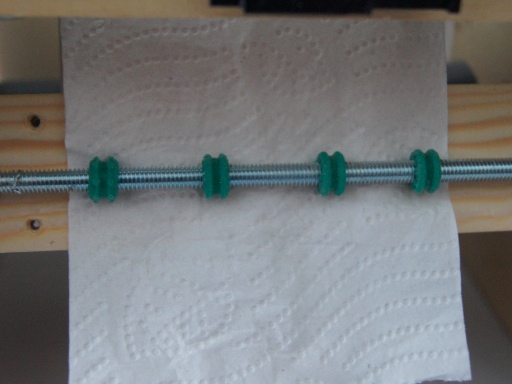
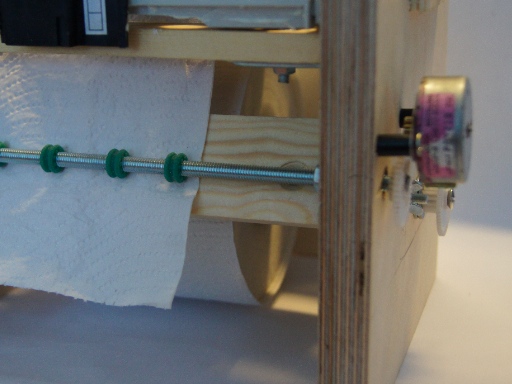
For the paper feed I used another piece of the threaded rod, mounted on the frame a little way in front of the roll holder. Here, too, I installed two ball bearings in the way described above. Behind it I attached a wooden strip over which the paper is then pulled. But since the threaded rod didn’t grip the paper quite as well as I had imagined, I was once again at a loss. First I tried slipping a piece of tubing over the threaded rod, but unfortunately that was still too smooth. But for this problem, too, I found the solution in one of the gutted CD-ROM drives. The read head mechanism mentioned above is mounted on rubber sleeves, which protect the read head from shocks. By chance these rubber mounts fit exactly onto the threaded rod. A first test looked very promising. After a bit of fine-tuning I was happy with the result. To improve things a little further, I sanded the wooden strip several times with sandpaper of various grits until it finally had a perfectly smooth surface.
Which printing method?
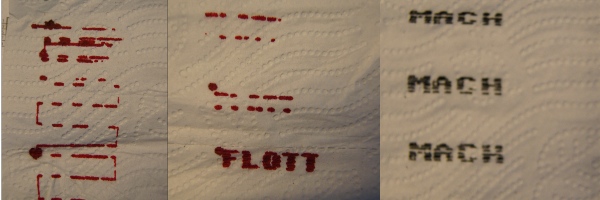
Since the idea of moving the toilet paper back and forth for a kind of CNC was still floating around in my head, I fitted both shafts with a stepper each. For testing I then used the Adafruit Motor Shield for the Arduino. After several hours of playing around with different motor settings and gear ratios, I eventually gave up. Since the motors were connected to the shafts through different gear ratios and on top of that had different power ratings, the whole thing became too imprecise. The elastic properties of toilet paper also caused me big problems in this respect. So a new idea was needed. Some time ago I had seen a video of a Lego printer on YouTube. What didn’t really convince me about that video, though, was that the printer printed graphics pixel by pixel. I wanted to feed my printer with ASCII-compatible text, however. Nevertheless I decided on a similar printing method. This had the advantage that I needed only one stepper motor for the feed instead of two, and therefore one motor driver less. The picture shows the first print attempts.
Control
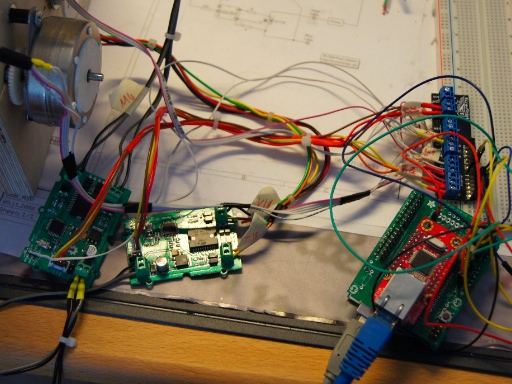
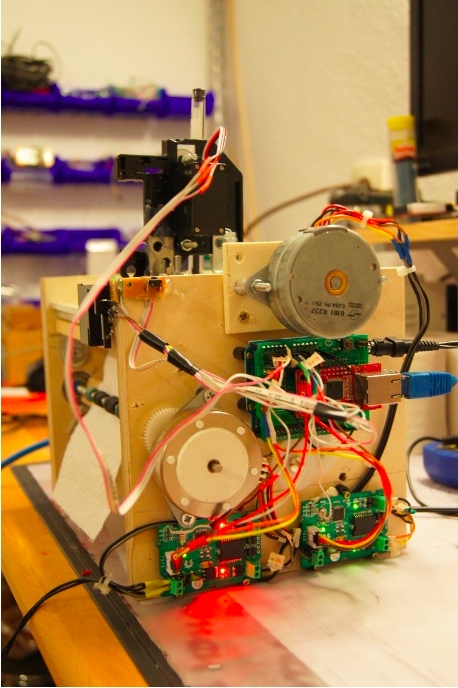
As mentioned above, an Arduino serves as the controller. To make the whole thing network-capable, the Ethernet Shield mentioned above was added as well. In the beginning I was still driving the stepper motors with the Adafruit Motor Shield. However, that shield occupies a lot of the Arduino’s pins. That would have made connecting a network shield unnecessarily complicated. Since I had been eyeing I2C-capable motor drivers for quite some time anyway, I ordered two suitable drivers from Seeed right away. I used the delivery time to start getting to grips with programming the software. Once the motor drivers had arrived, I first wrote a library for the Arduino to run the Twig I2C motor drivers. Since there were now plenty of inputs and outputs free on the Arduino, I quickly added a push button from a CD-ROM drive as a limit switch for calibration. A pressure sensor ( SEN-09673 ) was also installed for calibrating the pen. So when the device is switched on, the print head first moves to its home position and the contact pressure of the pen is set. I screwed all of the control electronics onto the right side panel and wired them up. For the wiring I used old ribbon cables for drives and mainboard connectors from an old PC case. After a few hours of stripping, wiring and soldering, the printer build was pretty much ready for the first tests. What was still missing was finishing the software.
Programming
I won’t go into every detail of the program code here. I’ll only show a few important sections as listings. If you’re interested in the details, you can download the code, have a look at the Arduino libraries for networking , stepper motors, servos, or browse through my Arduino tutorials.
One of the most interesting parts of the code (Listing 1) is writing a line. For this I defined a byte array that contains the character set. Since I’m still a big fan of the Commodore 64, the Commodore font of course had to do the job.
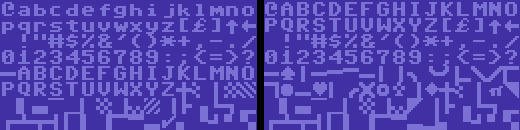
The text to be printed is received via a socket and stored in a char array. Then the print function is called. The print function essentially consists of the code in Listing 1. Since a character is represented by exactly 8×8 pixels, the loop variables run up to these values. So exactly 8 rows have to be printed to render one line of text. To find the corresponding letter in the byte array, the index is shifted by 8 positions in the array. The pen position is stored and compared in the next step. If the position hasn’t changed, the pen stays in its previous position, otherwise the pen position is changed. To speed up printing, a further loop also runs the whole pass backwards.
Listing 1:
for(zl=0;zl<8;zl++){

for (bs=0;bs<tlen;bs++){

for (bt=0;bt<8;bt++)

if (!(zl&1)){

h_f = font[ (int) txt[bs] *8 + (int)zl];

{

pen=((h_f<<bt) & 128);

if(pen != old_pen){

if(pen){

do_pen(DOWN);

} else {

do_pen(UP);

}

old_pen = pen;

}

stepper.step(TOP_STEPPER,letter_width,FORWARD);

}

} else {

h_f=font[(int)txt[tlen-bs-1]*8+(int)zl];

for (bt=0;bt<8;bt++);

pen=((h_f>>bt) & 1);

if(pen != old_pen){

if(pen){

do_pen(DOWN);

} else {

do_pen(UP);

}

old_pen = pen;

}

stepper.step(TOP_STEPPER,letter_width,BACKWARD);

}

}

}//for bs

do_pen(UP);

pen=false;

old_pen=false;

stepper.step(FRONT_STEPPER,line_height,FORWARD);

}//for zl

stepper.step(FRONT_STEPPER,line_break, FORWARD);
To send the line to be printed, I wrote a small script (Listing 2) in Python. It opens a socket to the printer and pushes the text to be printed to the printer. It then waits for the printer to send a confirmation once the print job is complete. There is plenty of room for expansion here. You could, for example, write a script that sends tweets or RSS feeds etc. to the printer. That could then be run every morning by a cron job, for instance. That way you’d be up to date on world affairs every morning while sitting on the throne. I’m currently thinking about a Facebook app that would let people send me greetings, jokes or comments via the printer.
Listing 2:
import socket

import sys

input_text = sys.argv[1]

input_text += '\n'

HOST = '192.168.0.30'

PORT = 80

s = socket.socket(socket.AF_INET, socket.SOCK_STREAM)

s.connect((HOST, PORT))

s.send(input_text)

data = s.recv(1024)

if data == 'OK':

print 'DONE'

s.close()
A few details to finish
The following pictures show the complete device once more, without any toilet paper loaded.
The blue strip on the paper guide is foam rubber, by the way. The foam rubber gives it a slight springiness. That way the paper doesn’t tear so easily, and it’s also gentler on the pen. To make the paper slide over the guide more easily, I also attached two round aluminium rods from the hardware store there.
Two wall power supplies from the bulky waste power the printer. One supplies the motor drivers (12 V) and one supplies the Arduino (5 V). But here, too, a different solution is already being planned. It would be nicer to power the printer from just one power supply.
Thanks to the wing nuts I screwed onto the left side panel, that side can be opened and folded away very quickly, which makes loading a new roll of toilet paper fast.
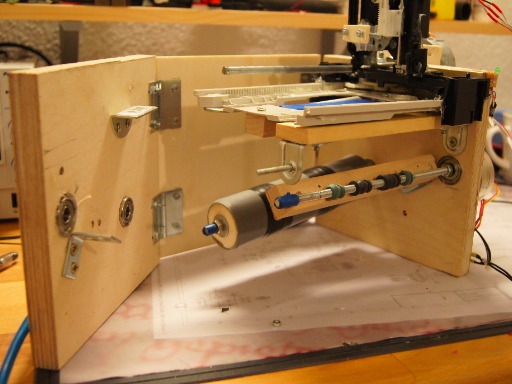
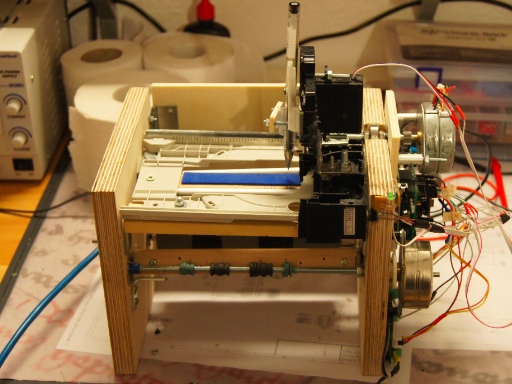
With a Wi-Fi access point connected, the whole thing could even run autonomously. Thanks to its compact design, the printer can easily be mounted on the bathroom wall. All in all, then, scrap makes it possible to print on toilet paper in the simplest of ways…
A few funny links I found while researching toilet paper:
Comments