Preparations
Below I describe one way of mounting the PCB in the enclosure. I’m of course happy to hear other suggestions and would present them here as well. To assemble the enclosure you need a 3mm and a 5mm drill bit and 4 small self-tapping screws with a diameter of 3mm, ideally about 10 mm long. You also need washers; I use washers with an outer diameter of about 7 – 8 mm.
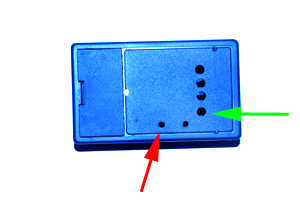
First the holes have to be drilled into the enclosure. Drill 2 holes of 3mm diameter each (red arrow) into the enclosure for the push buttons, matching the PCB. Then drill 4 holes of 5mm diameter each (green arrow) into the enclosure for the LEDs. Make sure the holes are drilled exactly so that the PCB can be placed between the enclosure’s mounting posts.
TIP: To make positioning the holes easier, I offer a drilling template for download here. Simply cut out the template with scissors and place it between the screw posts in the enclosure. Mark and drill.
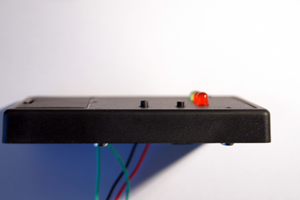
Next, place the finished PCB in the enclosure so that the LEDs and push buttons go exactly through the holes. The push buttons and LEDs should now stick out of the enclosure a little, as shown in the picture.
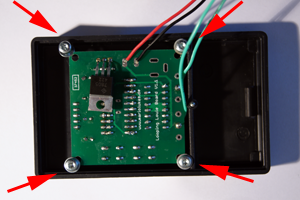
Now the Kamikaze Louie kit can be screwed to the enclosure’s mounting posts as shown in the picture. I also used the washers so that the screws hold the PCB better. If the screw heads are wide enough, though, you can leave the washers out.
TIP: Screwing the PCB down is not strictly necessary. If you’re in a hurry, it’s enough to clamp the PCB between the enclosure’s lid and base with a piece of cardboard or something similar. The holes for the push buttons and LEDs keep the PCB from shifting to the left or right.
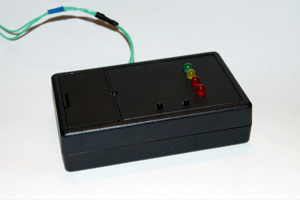
Finally, the battery clip has to be routed into the enclosure’s battery compartment. I also drilled a small hole in the side of the enclosure to lead the wires for the dummy battery to the outside. The enclosure can then be closed with the enclosure screw and should look similar to the picture.